Embroidery enthusiasts, get ready to upgrade your crafting game! In this post, we reveal the top 5 embroidery machines for 2025, chosen for their blend of performance, advanced features, and ease of use. Whether you’re new to embroidery or a seasoned pro, these expert-recommended models are sure to meet your needs and inspire your next creative project. Read on to find the perfect machine to take your embroidery skills to new heights.
Best Embroidery Machines of 2025: Expert Reviews and Recommendations
Our top picks:
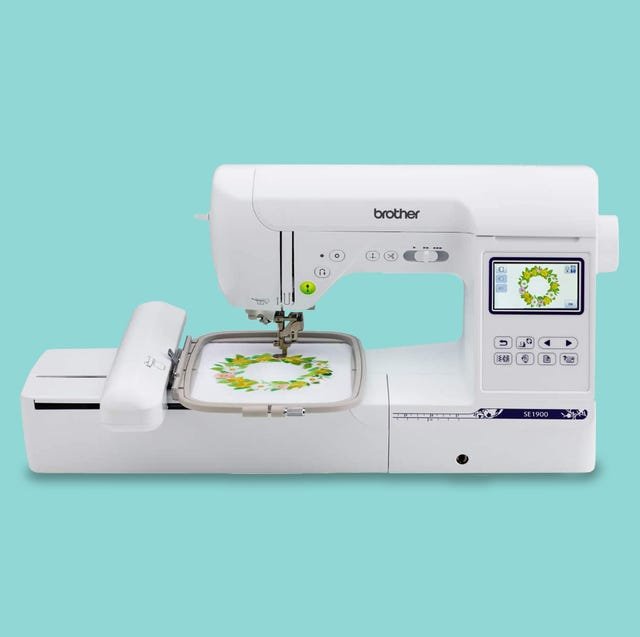
- Best Overall: Brother SE2000 Computerized Sewing and Embroidery Machine
- Best Value: Brother SE600 Sewing Machine
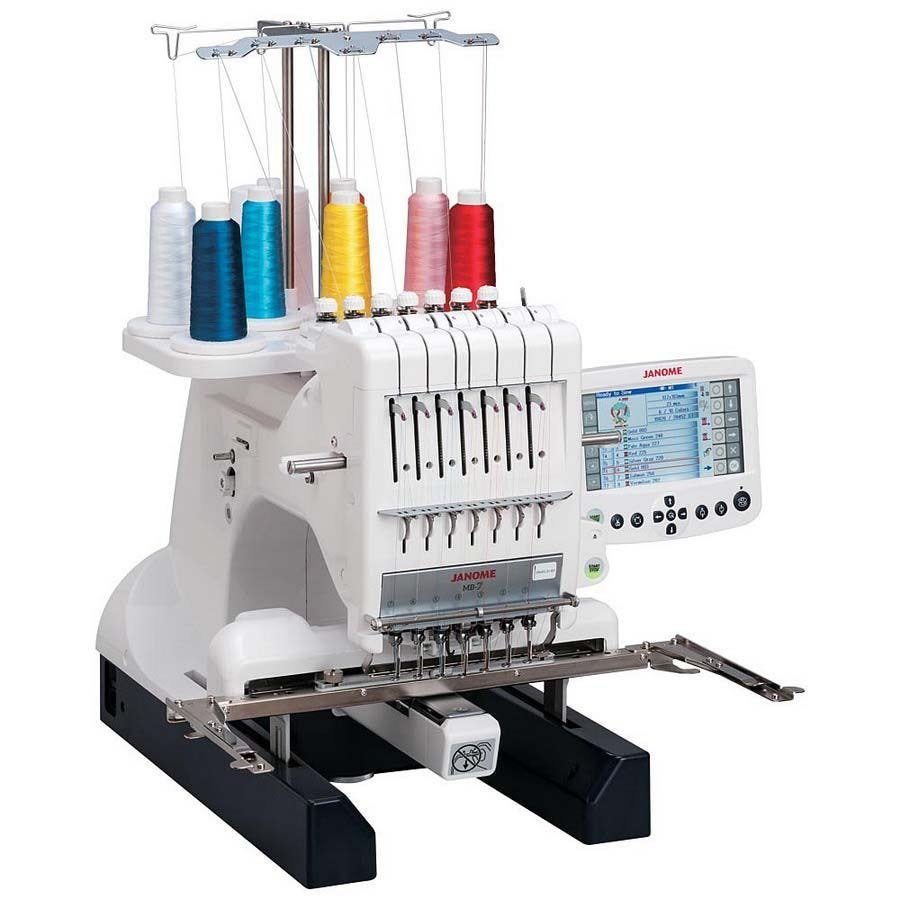
- Best for Home Business : Janome MB-7 Seven-Needle Embroidery Machine
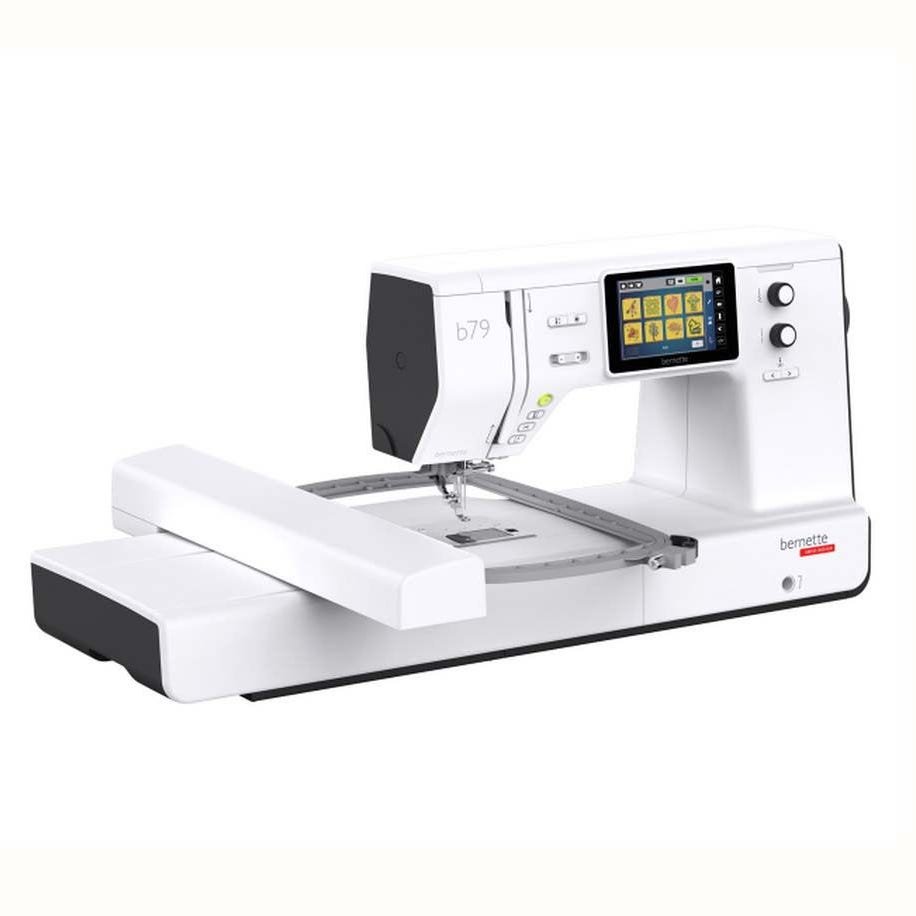
- Best for Embroidery and Sewing: Bernette B79 Sewing and Embroidery Machine
- Best for Begenners : Brother PE535 Embroidery Machine
1. Best Overall Embroidery Machine
Brother SE2000 Computerized Sewing and Embroidery Machine

This versatile Brother model serves as both an embroidery and sewing machine, highly rated for its user-friendly features. It includes a large touchscreen, automatic thread cutting, speed control options, and a needle up/down function, plus all the accessories needed for an easy start. With a spacious 5″ x 7″ embroidery area, it accommodates a wider variety of design sizes, and patterns can be uploaded wirelessly for added convenience. Users find Brother machines intuitive to operate, especially with features like the automatic needle threader and bobbin winding. This upgraded model improves on the popular Brother SE1900, providing enhanced capabilities for all embroidery and sewing projects.
Pros
- Large 5 x 7-inch embroidery area
- Can upload designs wirelessly or via a USB port
- Touchscreen to adjust designs
Cons
- Newer model with fewer reviews
| Weight | 38 pounds (with all included accessories) |
|---|---|
| Built-in designs | 193 designs and 13 fonts |
| Ability to upload custom designs | Yes, wirelessly or via USB port |
| Machine type | Single needle |
Pros
- Easy-to-follow controls
- Affordable price point
- Variable speed settings
Cons
- Smaller embroidery area
For under $500, this sewing machine with embroidery capabilities is a fantastic value. Equipped with a clear LCD screen, an easy drop-in bobbin, adjustable speed settings, and free-motion sewing options, this Brother machine is well-suited for all kinds of sewing and embroidery projects. It includes a 4″ x 4″ embroidery area with 80 built-in designs, plus a USB port for uploading custom designs. The included instructions are beginner-friendly, making it an ideal choice for those new to sewing and embroidery.
| Weight | 26.3 pounds |
|---|---|
| Built-in designs | 80 designs and 6 fonts |
| Ability to upload custom designs | Yes, via USB |
| Machine type | Single needle |
3 .Best Embroidery Machine for Home Business
Janome MB-7 Seven-Needle Embroidery Machine
Pros
- Included accessories such as storage and an embroidery table
- Independent bobbin winder
- Bright LED lights
Cons
- No sewing capabilities
If you’re tapping into the embroidery trend and selling your designs on platforms like Etsy, this multi-needle embroidery machine from Janome is a smart investment. Designed for efficiency, it allows you to pre-thread its seven needle heads for faster, multi-color embroidery. With a generous embroidery area of 9.4″ x 7.9″, this machine supports a wide range of design styles and includes a USB port for easy design uploads. Note that, as a multi-needle model, it focuses solely on embroidery rather than sewing. Users love the large LCD screen, independent bobbin winder (enabling bobbin winding while the machine is in use), and the many included accessories that streamline the embroidery process.
| Weight | 50 pounds |
|---|---|
| Built-in designs | 50 designs and 10 fonts |
| Ability to upload custom designs | Yes, via USB |
| Machine type | Multi needle (7 needles) |
4 .Best Embroidery Machine for Embroidery and Sewing
Bernette B79 Sewing and Embroidery Machine
- Tie off and automatic thread cutting features
- Massive work table
- Huge 10 x 6.3-inch hoop size
Cons
- Takes time to master new features
This sewing and embroidery machine is a true game-changer, packed with innovative features for a seamless experience. Automatic tie-off (eliminating the need for backstitching) and thread cutting can be programmed to save time and effort. You can even customize stitches by drawing directly on the large touchscreen display. With a maximum hoop size of 10″ x 6.3″, it handles large embroidery designs with ease, and its impressive speed of up to 1,000 stitches per minute makes it a powerful choice for serious crafters. Users frequently rate this as one of their favorite machines for both sewing and embroidery projects.
| Weight | 47 pounds (with all included accessories) |
|---|---|
| Built-in designs | 208 designs |
| Ability to upload custom designs | Yes, via USB |
| Machine type | Single needle machine |
Pros
- Affordable pricepoint
- 4″ x 4″ embroidery field
- LCD touch screen
Cons
- No sewing capabilities
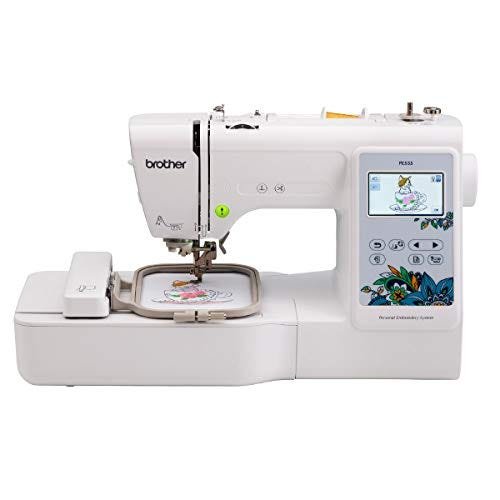
Unlike traditional bulky embroidery machines, this sleek Brother model is designed solely for embroidery, making it lighter and more portable. It features a color LCD screen for clear design previews and a USB port to upload custom designs. This machine handles floral patterns and text with ease, offering precision and quality in every stitch. Setup, threading, and design selection are intuitive, making it an excellent choice for beginners seeking a straightforward and reliable embroidery experience.
| Weight | 15 pounds |
|---|---|
| Built-in designs | 80 designs and 9 fonts |
| Ability to upload custom designs | Yes, via USB |
| Machine type | Single needle machine |

What features to look for when buying an embroidery machine

When shopping for an embroidery machine, whether you’re a beginner or an experienced crafter, it’s essential to consider several key features that can impact the ease of use, quality of work, and overall experience. Here’s a breakdown of the most important features to look for:
1. Embroidery Field Size
- What it is: The size of the area the machine can embroider on your fabric (usually measured in inches or millimeters).
- Why it matters: A larger embroidery field allows you to work on bigger projects, like larger garments or home décor items, without having to re-hoop the fabric.
- Look for: Machines with adjustable or multiple hoop sizes (e.g., 4″ x 4″, 5″ x 7″, 6″ x 10″) to give you flexibility.
2. Built-In Designs
- What it is: The machine’s internal library of pre-programmed embroidery designs.
- Why it matters: If you’re just starting out or prefer not to create custom designs, having a variety of built-in designs can save time.
- Look for: Machines that offer a good selection of designs (e.g., floral, monogramming, patterns) that align with your needs, or the ability to upload custom designs via USB or Wi-Fi.
3. Needle Count (Single vs. Multi-Needle)
- What it is: Refers to how many needles the machine has. Single-needle machines require you to manually change threads, while multi-needle machines automatically switch between threads.
- Why it matters: Multi-needle machines are faster and more efficient for complex or high-volume work, while single-needle machines are more affordable and easier for beginners.
- Look for: Multi-needle machines (6-10 needles) for large, professional, or commercial projects; single-needle machines for smaller, more casual projects.
4. Threading System
- What it is: The process of loading and guiding thread through the machine.
- Why it matters: A machine with an automatic threading system makes it easier to thread the machine, saving time and reducing frustration, especially for beginners.
- Look for: Automatic needle threaders, especially for single-needle machines, as well as easy-to-follow threading paths.
5. Touchscreen Display
- What it is: A digital display that shows your design, settings, and allows for easy navigation through the machine’s features.
- Why it matters: A touchscreen offers a more intuitive interface to customize designs, adjust stitch settings, and monitor the machine’s progress.
- Look for: A color touchscreen with good resolution that allows you to resize, rotate, and edit designs directly on the screen.
6. Speed Control
- What it is: The ability to adjust the stitching speed of the machine.
- Why it matters: Faster speeds can get large projects done quickly, but slower speeds give more control, which is useful for fine details and intricate designs.
- Look for: Machines with adjustable speed settings and a maximum speed of at least 800-1,000 stitches per minute.
7. Connectivity and USB Ports
- What it is: Allows you to upload custom embroidery designs directly from your computer or a USB drive to the machine.
- Why it matters: This feature is essential for creating your own designs or downloading more designs from online libraries.
- Look for: USB ports for importing designs, or even Wi-Fi or Bluetooth connectivity on higher-end models for wireless design transfers.
8. Automatic Thread Cutter
- What it is: A feature that automatically cuts the thread at the end of each color change or stitching sequence.
- Why it matters: It saves time and ensures clean, even stitches without you having to manually trim the threads.
- Look for: Machines with an automatic thread cutter for ease of use and less manual labor.
9. Monogramming and Editing Capabilities
- What it is: The ability to add monograms or edit designs, such as resizing, rotating, or combining designs.
- Why it matters: This feature is important if you plan to personalize items or want more control over your design customization.
- Look for: Built-in monogramming fonts and easy editing tools to adjust designs on the fly.
10. Stitch Types and Editing Options
- What it is: The variety of stitches available for different effects, such as satin stitches, fill stitches, or decorative stitches.
- Why it matters: The more stitch options available, the more creative flexibility you’ll have with your projects.
- Look for: A machine with a variety of stitch types and the ability to edit or combine them to create custom effects.
11. User-Friendly Software
- What it is: The software that comes with the machine to help you create and edit embroidery designs.
- Why it matters: Some machines come with specialized embroidery software that makes it easier to digitize and modify designs.
- Look for: Built-in software or compatibility with popular embroidery software programs like Hatch or PE-Design.
12. Price and Warranty
- What it is: The cost of the machine and any warranty coverage it comes with.
- Why it matters: You want to ensure you’re getting good value for your investment, and a warranty offers peace of mind if something goes wrong.
- Look for: Compare prices within your budget, and choose a machine with at least a 1-year warranty for parts and labor.
13. Machine Durability and Build Quality
- What it is: The overall construction and durability of the machine.
- Why it matters: A sturdy, durable machine will withstand frequent use and last longer.
- Look for: A well-built machine, preferably with a metal frame or solid components, for long-term use.
Summary of What to Look For:
- Embroidery Field Size: For larger projects, go for a bigger field size.
- Built-in Designs: Choose a machine with a wide selection of designs or easy upload options.
- Needle Count: Consider multi-needle for commercial or high-volume work.
- Threading System: Automatic threaders can save time and frustration.
- Speed and Control: Adjustable speed for fine detail or fast production.
- Connectivity: USB or Wi-Fi for easy design transfers.
- Editing Capabilities: Customization for monogramming and resizing.
By keeping these features in mind, you’ll be able to choose the embroidery machine that best suits your needs, whether you’re a hobbyist looking for something simple or a business owner who needs a high-performance machine.

What’s the difference between a single needle vs. multi-needle embroidery machine?

The main difference between a single-needle and a multi-needle embroidery machine lies in the number of needles and their functionality, which impacts how the machine operates and the types of projects it’s best suited for.
1. Single Needle Embroidery Machine
A single-needle embroidery machine has only one needle, which means you need to manually change threads for each color change in a design.
Pros:
- Affordable: Generally, single-needle machines are more budget-friendly.
- Compact and Portable: These machines are smaller and lighter, making them easier to transport and store.
- Easy for Beginners: Simple to use, with fewer features to learn, making it ideal for new embroidery users.
- Versatile: Great for smaller projects like monogramming, personalizing items, and smaller designs.
Cons:
- Manual Thread Changes: You must stop the machine to change threads whenever the design requires a color change, which can be time-consuming.
- Slower for Large Projects: Since you have to change threads manually, large or multi-colored designs take longer to complete.
Best for: Casual crafters, hobbyists, or those who are just getting into embroidery.
2. Multi-Needle Embroidery Machine
A multi-needle embroidery machine has multiple needles, typically 6 to 10, each loaded with a different color thread. This allows the machine to automatically switch between colors during the stitching process.
Pros:
- Automatic Thread Changes: The machine can automatically switch between needles, making it much faster for designs that involve multiple colors.
- Increased Productivity: Ideal for commercial use or for those who frequently work on large or intricate designs.
- Consistent Results: Because the machine doesn’t need to stop and start for color changes, you get more even stitching, especially for complex designs.
- Better for Larger Projects: You can handle bigger or more professional embroidery jobs, such as creating custom apparel or large home décor items.
Cons:
- More Expensive: These machines are usually much more expensive than single-needle machines due to their advanced features.
- Complex to Use: They have a steeper learning curve, with more settings and options to adjust.
- Larger and Heavier: Multi-needle machines tend to be bulkier, which might make them less portable.
Best for: Professional embroiderers, small business owners, or hobbyists who want to produce high-quality, high-volume embroidery quickly.
Key Differences at a Glance:
| Feature | Single Needle | Multi-Needle |
|---|---|---|
| Needles | 1 needle | 6-10 needles |
| Thread Changes | Manual (must stop to change thread) | Automatic (machine switches colors) |
| Price | Lower cost | Higher cost |
| Complexity | Simple, beginner-friendly | More complex, advanced settings |
| Speed | Slower, especially for multi-color designs | Faster, ideal for large or multi-color projects |
| Best Use | Small projects, home crafting | Professional, high-volume, or intricate designs |
Summary:
- Single-needle machines are great for personal or small projects, offering a more affordable and simpler option for hobbyists.
- Multi-needle machines are more suited for commercial or larger projects, offering faster production and a more streamlined process with automatic color changes.
Choosing between the two depends on your embroidery needs, budget, and the scale of your projects. If you’re just starting out or do occasional crafting, a single-needle machine may be sufficient. However, if you’re looking to take on larger or more complex projects, or run a small business, a multi-needle machine will be a better investment.
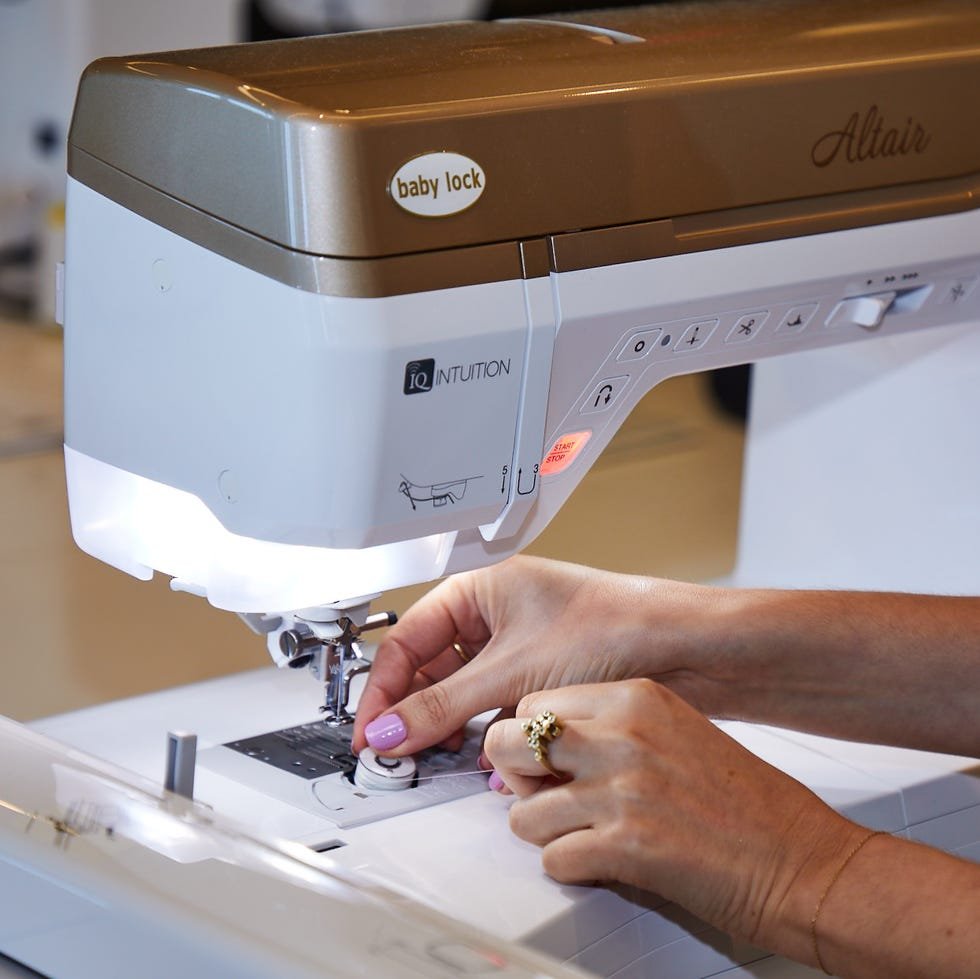
What is the easiest embroidery machine to learn on?

The Brother PE535 is widely recommended as one of the easiest embroidery machines for beginners. Here’s why it stands out:
- User-Friendly LCD Touchscreen: The PE535 has a 3.2” color LCD screen that allows beginners to see and edit designs in full color, which makes navigation and adjustments straightforward.
- Built-In Designs and USB Port: It includes 80 built-in embroidery designs and 9 fonts, which is helpful for those just starting out. The USB port allows you to import custom designs as well, giving flexibility to grow creatively.
- Automatic Needle Threader: This machine features an automatic needle threader, which is a huge timesaver and makes setup much easier for beginners who may find threading challenging.
- 4″ x 4″ Embroidery Area: The 4″ x 4″ workspace is ideal for smaller projects and learning, as it’s manageable but large enough to work with various design types.
- Easy Setup and Controls: With clear, beginner-friendly instructions and straightforward controls, the Brother PE535 is designed for easy learning without overwhelming new users.
How to use a computerized embroidery machine

Using a computerized embroidery machine can seem daunting at first, but with a few basic steps, you’ll be on your way to creating beautiful embroidery projects. Here’s a simple guide to help you get started:
Step 1: Set Up Your Machine
- Unpack and Position: Place your embroidery machine on a flat, stable surface.
- Plug It In: Connect your machine to a power source and turn it on.
- Attach the Embroidery Unit: If your machine has a separate embroidery unit, attach it securely.
Step 2: Prepare Your Design
- Select a Design: Choose a built-in design or upload one via USB or Wi-Fi, depending on your machine’s features.
- Load the Design: Use the machine’s touchscreen or buttons to select and load the design onto your workspace.
Step 3: Hoop Your Fabric
- Choose the Right Hoop: Select the appropriate hoop size for your project.
- Stabilize Your Fabric: Add stabilizer to the back of the fabric to prevent puckering.
- Hoop the Fabric: Place the fabric and stabilizer in the embroidery hoop, ensuring it is taut and secure.
Step 4: Thread the Machine
- Thread the Top: Follow the threading guide to thread the upper part of the machine.
- Thread the Bobbin: Insert the pre-wound bobbin and ensure it’s properly threaded and positioned.
Step 5: Position the Hoop
- Attach the Hoop: Slide the hooped fabric into the embroidery unit and lock it in place.
- Adjust Placement: Use the machine’s settings to position the design accurately on the fabric.
Step 6: Start Embroidering
- Preview the Design: Check the preview to ensure the placement and settings are correct.
- Press Start: Begin the embroidery process and monitor the machine as it works.
Step 7: Monitor and Adjust
- Keep an Eye: Watch for any issues, such as thread breaks or fabric shifts, and pause the machine if needed.
- Adjust Threads: If the thread runs out or breaks, stop the machine, fix the issue, and resume.
Step 8: Finish and Remove
- Complete the Design: Wait for the machine to finish the embroidery.
- Remove the Hoop: Detach the hoop and carefully unhoop the fabric.
- Trim Threads: Snip any loose threads for a clean finish.
Tips for Success:
- Use High-Quality Thread: This helps prevent thread breaks and ensures smoother stitching.
- Select the Right Stabilizer: The right stabilizer depends on your fabric type and design complexity.
- Practice on Scrap Fabric: Before embroidering on your final project, practice with a similar fabric to perfect your technique.


