Hedgehog House
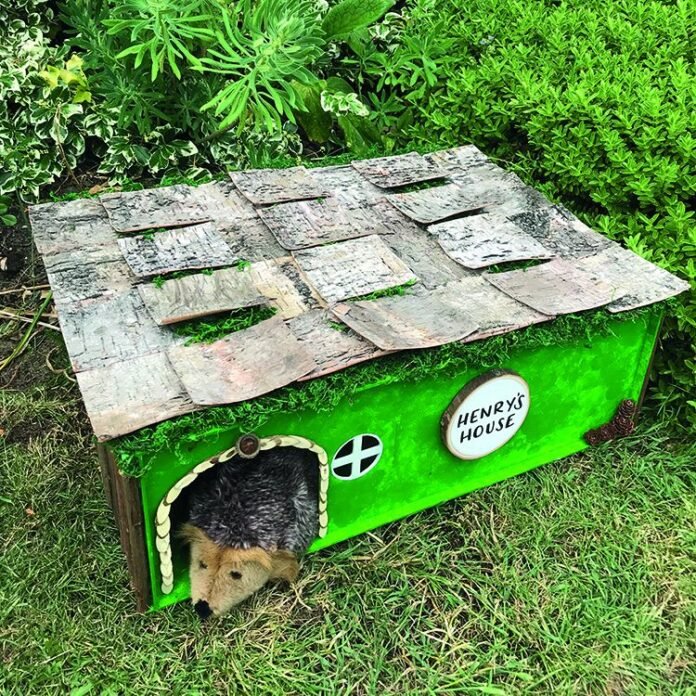
Create a charming and cosy haven for your hedgehog visitors with this delightful house. Perfect for building and decorating, it provides a snug retreat that will keep your prickly friends comfortable and happy.
Skill Level
Intermediate
Time to Make
1 hour
Adult Supervision
Yes

How to Make
Step 1
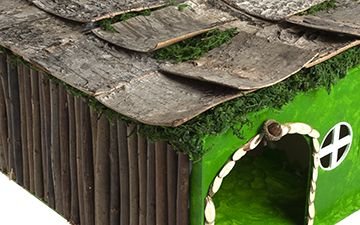
Using your glue gun, squeeze a line of glue onto the back of your willow sticks and attach to the sides and back of your house. Starting with the corners and work along.
Take your sticky glue and run strips of glue along the top edges of the roof and cover with your dried moss and leave to dry.
Lay your bark squares in a pattern in lines of 6 overlapping each one and glue gun in place. Fill any gaps on show with your dried moss.
Step 2

Attach your natural branch chips around the door arch and placing an acorn in the cen-tre.
Using your white deco pen, draw around the outline of the window and colour in.
Paint a circle onto your willow circle using your white acrylic paint, leave to dry.
Decorate any edges or corners with glue and larch cones
Using your black deco pen, write the name of your hedgehog’s house on the white painted willow circle and glue gun onto the front.
Place your house in a quiet part of the garden, under thick vegetation or behind a shed is ideal. Hedgehogs can be a little fussy about where they live. The box needs to be out of direct sunlight and the front entrance should be out of the wind.
Step 3

Once you have built your hedgehog house, paint a layer of white acrylic and leave to dry. This will act as a primer for your green paint.
Using your sponge dabber and green paint cover the sides, front and back of the house (also the outer edge of the roof as this will be on show slightly) Allow to dry and repeat for brighter colour if needed.


