

Avery 3279 Dark Fabric Transfers are a practical choice for occasional DIY shirts, tote bags, and similar projects when you have an inkjet printer and need a white-backed transfer for dark fabric. The main advantages are the no-mirror workflow, compatibility with a household iron or heat press, and Avery’s Design & Print templates. The main limitations are the visible transfer layer, the need to trim carefully, and the fact that application quality depends heavily on heat, pressure, fabric, and care.
This article combines Avery’s current product and application instructions with the useful parts of Craft Ideas’ original hands-on review. The original review was performed by Katie Begley and reported bright printed color, easy backing removal, and some uneven color after transfer. Those observations are preserved as historical firsthand evidence; Lê Ruby has not independently repeated that test for this update.
Quick Verdict
Jump to:
Best for: occasional DIY crafters using an inkjet printer on dark 100% cotton or cotton/poly blend fabric who want to print a custom design at home.
Main advantage: Avery 3279 prints right-side up, so you do not mirror the design. The white transfer layer helps white areas and bright graphics remain visible on dark fabric.
Main limitation: the transfer layer remains visible, so trimming matters. Large solid designs can also feel and look more like an applied layer than a print embedded into the fibers.
Choose something else if: you need a laser-printer product, a highly stretchable garment workflow, or a high-volume commercial shirt-production process.

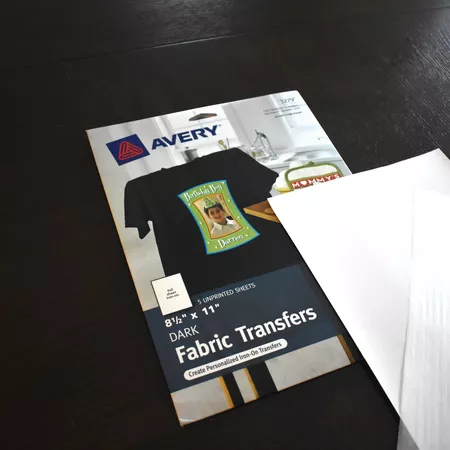
Quick Facts: Avery 3279 Dark Fabric Transfer
| Specification | Avery 3279 |
|---|---|
| Product number | 3279 |
| Sheet size | 8.5 x 11 inches |
| Sheets per retail pack | 5 matte sheets on Avery’s current product page |
| Printer type | Inkjet only |
| Intended fabric color | Dark fabrics; the white-backed transfer can also be used when you want white areas to remain visible |
| Fabric compatibility | 100% cotton or cotton/poly blends, following Avery’s current guidance |
| Household iron | Supported |
| Heat press | Supported |
| Mirror image required? | No |
| Cutting | Trim around the design; Avery says the sheets can also be cut with electronic or die-cutting machines |
| Heat press setting | 320°F / 160°C, light-to-medium pressure, 30–45 seconds |
| Manufacturer wash claim | Avery says transfers are guaranteed to look good after 20 washes when applied and cared for according to instructions |
Avery’s current product page identifies this as product 3279, an 8.5 x 11-inch, matte, five-sheet pack for inkjet printers. Avery’s support documentation also specifically applies the dark-transfer instructions to 3279.
What Are Avery Dark Fabric Transfers?
Avery Dark Fabric Transfers are printable heat-transfer sheets made for applying inkjet-printed designs to dark-colored fabric. Unlike Avery’s light-fabric transfers, the dark product uses a white-backed transfer layer, so white areas in the artwork can remain white instead of becoming transparent against the shirt.
That white layer is the reason dark-transfer paper behaves differently from light-transfer paper. It also explains two practical rules: you do not mirror the artwork, and any untrimmed white area can remain visible around the finished design.
Avery 3279: What Exactly Is It?
3279 is Avery’s current product number for its 8.5 x 11-inch Fabric Transfers for Dark Fabrics. Avery lists five matte sheets per retail pack, one full transfer per sheet, and compatibility with inkjet printers.
Avery’s current product guidance says the transfer works best on 100% cotton or cotton/poly blends with minimal stretch. It is not a laser-printer or sublimation product.
Avery also provides a 3279 template through Design & Print Online. You can use Avery’s template system, upload finished artwork, or create the design in another program as long as the final print setup follows the 3279 instructions.
Avery Dark Fabric Transfer Review: What the Original Test Found
The original Craft Ideas review contained genuine firsthand observations from Katie Begley. Those results should remain separate from the current editorial update because the product was not re-tested for this rewrite.
Print color before transfer: bright and crisp
In the original test, the printed design used bright blue with white text. Katie reported that the printed sheet showed strong color, crisp edges, and white text that stood out clearly.
Gone are the days when do-it-yourself t-shirt personalization meant thin white t-shirts and cheap-looking images. With a printer and an iron, you can transfer an image onto any color fabric with t-shirt transfers made specifically for dark fabrics. We take a closer look at Avery Printable T-Shirt Transfers for Dark Fabrics to see how the quality holds up and if anyone can do it on their own with ease. Read on to learn more about our review of this product.
Image and Color Quality: Bright but inconsistent
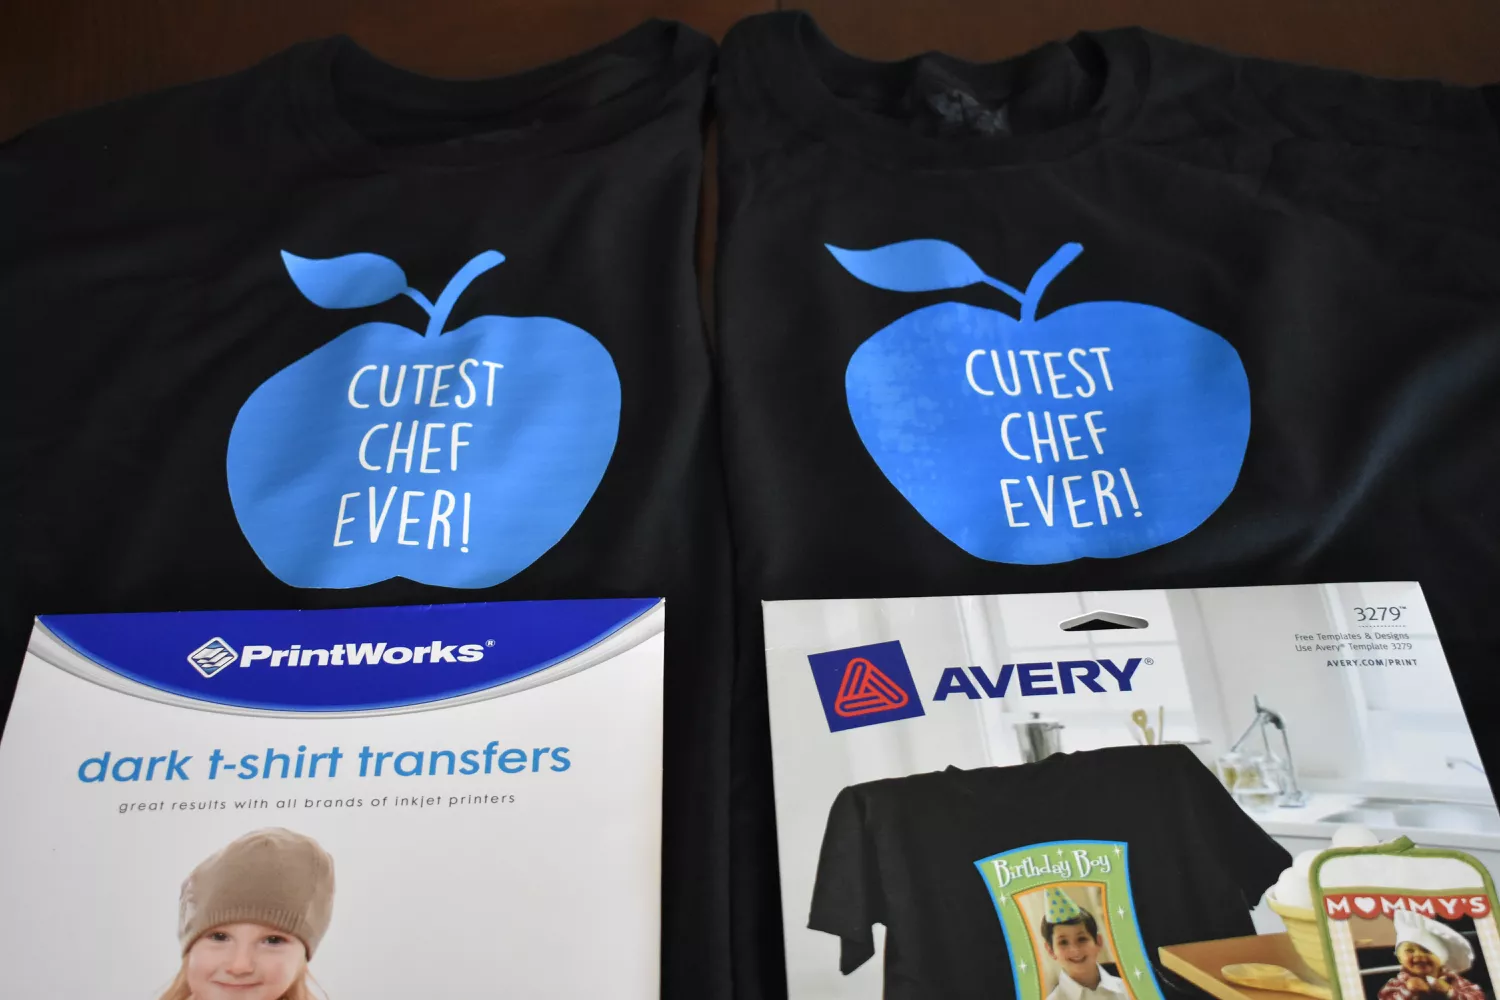
We loved how bright the colors turned out using the Avery Printable T-Shirt Transfers for Dark Fabrics. We printed bright blue images with white text. The colors looked great. They were vibrant, and the same throughout the entire design. The blue on the transfer sheet appeared just as it had on our computer screen, and the white text popped against that bright color. The edges were crisp, which is important when dealing with high-contrast images.

After application: color became less uniform
The same original test reported that some areas looked different after ironing, creating a mottled effect in the solid-color portion of the image. That is useful evidence, but it should not be generalized into a claim that every 3279 transfer will behave the same way. Avery itself notes that results can vary with fabric, ironing equipment, temperature, and wash method.
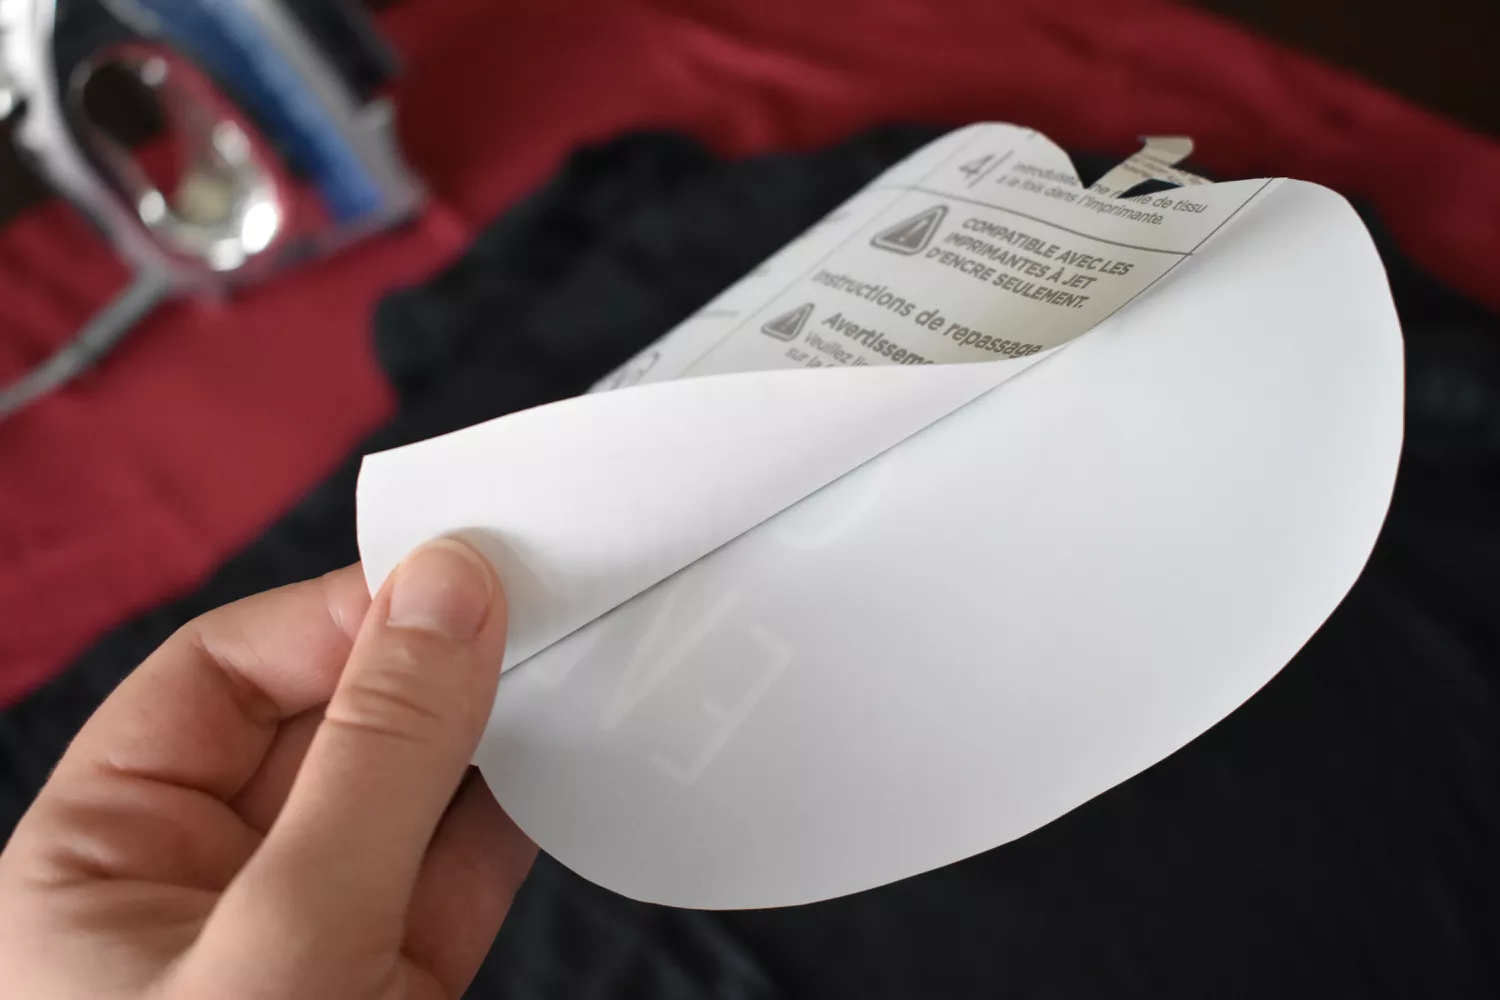
Backing removal was straightforward
Katie also reported that the backing was easy to peel after cutting the design. That matches the basic 3279 workflow: print, trim, peel the backing, place the transfer image-side up, cover it with the supplied tissue, and apply heat.

Historical test vs. current instructions
The old review said additional ironing time was needed in that particular test before the edges appeared secure. For this updated guide, the safer default is Avery’s current product-specific timing rather than adding a universal extra 15 or 20 seconds. If the transfer lifts, Avery’s current instructions say to reapply the ironing steps.
How to Use Avery Dark Fabric Transfers
For Avery 3279, follow the dark-fabric process rather than generic transfer-paper advice. The key differences are that the design prints right-side up, the backing is removed before application, and the transfer is placed on the garment with the printed design facing up.
Step 1 — Create Your Design
Create the artwork in Avery Design & Print, another design program, or your preferred editor. Avery offers a dedicated template for 3279, but using Avery’s software is not mandatory if your artwork is sized correctly.
Remember that the dark transfer behaves like a white-backed printable layer. If your artwork contains transparent or blank areas, those areas may appear white unless you trim them away. This is especially important around lettering, logos, and irregular shapes.
Step 2 — Print the Design
Use an inkjet printer. Avery specifically says not to use a laser printer for 3279.
Do not mirror or reverse the image. Avery’s dark-transfer instructions say the artwork should print in its normal orientation because the transfer is applied face up.
Avery recommends making a test print on plain paper first and feeding one transfer sheet at a time. That simple check can catch sizing or layout mistakes before you use a transfer sheet.
Step 3 — Trim the Transfer
Cut around the design, leaving only the transfer area you actually want on the garment. Avery suggests leaving a small grab tab temporarily to make backing removal easier.
Trimming is more important with dark transfer paper than with a transparent light-fabric transfer because the white transfer layer can remain visible around the artwork.
Avery says 3279 can be cut with scissors and is also compatible with electronic and die-cutting machines. If you already use a cutting machine, see our Cricut Explore Air 2 review for the broader machine workflow. Always make sure your actual Print Then Cut or cutting-machine setup is compatible with the transfer sheet and your software before committing a full sheet.
Step 4 — Prepare the Shirt and Work Surface
For a household iron, Avery says to use a smooth, heat-resistant surface that can absorb pressure, such as a wooden table. Do not use an ironing board, glass, granite, concrete, or another unsuitable heat-retaining or heat-sensitive surface.
Place a towel on the work surface, put the garment on top, and iron out wrinkles before positioning the transfer.
Empty the iron and turn steam off. Avery’s current dark-transfer instructions call for a high/cotton setting for the standard garment workflow.
Step 5 — Peel the Backing and Position the Transfer
After printing and trimming, peel the backing away from the transfer. Place the printed transfer on the garment design side up.
Cover it with the tissue sheet included with the product. Do not iron directly onto the printed transfer surface.
Step 6 — Apply With a Household Iron
Avery’s current 3279 instructions call for heavy pressure with a household iron. The recommended time varies with transfer size:
| Transfer size | Avery ironing time |
|---|---|
| Full sheet | 2 minutes |
| Half sheet | 1 minute |
| Quarter sheet | 40 seconds |
Move the iron according to Avery’s application instructions and keep the tissue sheet between the iron and the transfer.
Step 7 — Cool and Remove the Tissue
Avery says to allow the transfer to cool for about 2–3 minutes with the tissue still in place. Then peel the tissue away carefully.
If an edge lifts, do not automatically invent a hotter setting or a much longer press. Avery says to reapply the ironing steps. Excessive heat or time can also cause problems; Avery’s troubleshooting documentation notes that overheating can contribute to yellowing.
Do You Mirror Avery Dark Fabric Transfers?
No. Avery specifically says not to mirror or reverse the image for 3279 dark-fabric transfers. The design prints in its normal orientation because you peel off the backing and place the printed transfer face up on the garment.
This is one of the most important differences between Avery dark and light transfers. Avery light-fabric transfers are applied face down and require a mirrored design; 3279 dark transfers do not.
Can You Use a Regular Iron With Avery Dark Fabric Transfers?
Yes. Avery supports a standard household iron for 3279. Use no steam, remove water from the iron, work on a smooth heat-resistant surface rather than an ironing board, place a towel under the garment, and follow Avery’s size-based ironing times.
Avery’s current standard 3279 instructions call for a high/cotton setting and heavy pressure. If the packaging supplied with your specific pack differs, follow the instructions packaged with the product.
Can You Use a Heat Press?
Yes. Avery publishes a heat-press workflow for 3279:
| Method | Setting |
|---|---|
| Household iron | High/cotton setting; heavy pressure; time varies by transfer size |
| Heat press | 320°F (160°C); light-to-medium pressure; 30–45 seconds |
These are Avery’s settings for its dark T-shirt transfer workflow, not generic heat-transfer-paper values.
What Fabrics Work With Avery Dark Transfers?
| Fabric | Compatibility |
|---|---|
| 100% cotton | Supported by Avery |
| Cotton/poly blend | Supported by Avery’s current product/help guidance |
| Highly stretchable synthetic fabric | Not the intended 3279 use; Avery has a separate stretchable transfer product |
| Laser-print transfer workflow | Not compatible; 3279 is for inkjet printers |
| Dark shirt | Primary intended use |
| White/light shirt | Can be used when you specifically want the white-backed transfer effect, but Avery’s light-transfer products may be a better fit when a transparent background is desired |
Avoid the claim that 3279 “works on any fabric.” Avery’s own compatibility guidance is narrower.
How Does the Print Look on Dark Fabric?
The white transfer layer is what allows bright colors and white areas to remain visible on a dark shirt. It also means the edge of the transfer can be visible, especially when the artwork has an irregular shape or a lot of unprinted white area around it.
The original Craft Ideas test reported bright printed color and crisp edges before transfer, but some uneven color after ironing. Because that was one historical test, it should be treated as a real data point rather than a universal prediction.
[IMAGE OPPORTUNITY: Photograph the same design on black, navy, dark red, and dark gray cotton shirts. Include close-ups of white areas, edge visibility, solid-color uniformity, and surface texture.]
Avery Dark vs. Light Fabric Transfer Paper
| Avery Dark Fabric Transfer 3279 | Avery Light Fabric Transfer | |
|---|---|---|
| Intended shirt color | Dark fabric; can also be used when a white backing is desired | White or light-colored fabric |
| Printer | Inkjet | Inkjet |
| Mirror design? | No | Yes |
| Transfer background | White/opaque layer remains visible | More transparent after application |
| Placement | Peel backing; image faces up | Transfer is placed face down |
| Trimming importance | High when you do not want a white border | Different because the background becomes more transparent |
| Best reason to choose | Keeping artwork visible on dark fabric and preserving white areas | Creating designs on light fabric with a less-visible background |
If you are working specifically with light shirts, see our Avery Light Fabric Transfers review rather than applying the dark-transfer instructions to a different product.
Avery Dark Fabric Transfers vs. Other Transfer Papers
This page is intentionally focused on Avery 3279 rather than ranking every transfer paper.
Choose Avery 3279 if…
- You have an inkjet printer.
- You are printing on a dark cotton or cotton/poly garment.
- You want white areas in the artwork to stay visible.
- You want a workflow supported by both a household iron and a heat press.
- You value Avery’s Design & Print templates and 3279-specific support documentation.
Consider another transfer paper if…
- You use a laser printer.
- Your garment is highly stretchable.
- You want a more transparent transfer background on a light shirt.
- You are choosing among multiple brands and want a broader comparison instead of a single-product guide.
[INTERNAL LINK: Best Transfer Paper for Shirts — anchor: compare the best transfer papers for shirts]
There are a couple of good options on the market that are designed to be used with darker fabrics. Printworks Dark T-Shirt Transfers are less expensive and use an almost identical process. The colors were not quite as bright and vibrant, but we liked how they turned out. The color was more consistent than the Avery Printable T-Shirt Transfers for Dark Fabrics.
How Durable Are Avery Dark Fabric Transfers?
Avery currently states that its fabric transfers are guaranteed to look good after 20 washes when applied and washed according to instructions. That is a manufacturer claim, not a new Craft Ideas wash test.
The old Craft Ideas article did include firsthand application observations, but it did not document a controlled, multi-cycle 3279 wash test with enough detail to support a new independent durability claim. For that reason, this update avoids phrases such as “won’t crack,” “permanent,” or “lasts for years.”
Durability can be affected by application, fabric stretch, washing, drying, and whether the transferred area is subjected to direct heat later.
Washing Avery Dark Fabric Transfers
Avery’s current general fabric-transfer care page, which specifically includes 3279, says to wait 24 hours before washing. It also says to turn the garment inside out, machine-wash cold, use color-safe detergent, remove the garment promptly, avoid bleach, tumble-dry low, and never iron directly over the transferred image.
Avery’s product-specific dark-transfer page also says to wash inside out in cold water with mild detergent and dry flat or with low heat. It warns against fabric softener because it can contribute to fading, cracking, or peeling.
If instructions included with your current package differ from online documentation, follow the instructions packaged with the product.
Common Avery Dark Transfer Problems
Problem: The transfer edges are visible
This is usually not a defect by itself. Avery dark transfers use a white-backed layer, so unprinted or untrimmed areas can remain visible. Trim close to the artwork before application when you do not want a white border.
Problem: The design is peeling or lifting
Possible factors include insufficient heat or pressure, an incompatible fabric, an unsuitable ironing surface, washing too soon, or care that does not match Avery’s instructions. Avery notes that cracking or peeling can indicate that the transfer needed more pressure and heat during application.
Do not automatically increase temperature far beyond the recommended workflow. Too much heat can create other problems.
Problem: The transfer does not stick evenly
Check the work surface, pressure, wrinkles, fabric composition, and whether the tissue sheet was used correctly. For an iron, Avery wants a smooth heat-resistant surface rather than a padded ironing board.
Problem: Colors look dull or uneven
Possible factors include the original image, printer output, application conditions, fabric, or uneven heating. The original Craft Ideas test reported a mottled appearance after transfer in some solid-color areas, even though the printed sheet itself looked bright and consistent.
Problem: The transfer turns yellow
Avery says yellowing can occur when the iron is too hot or when the transfer is heated too long. Follow the product-specific temperature and timing guidance rather than generic transfer-paper advice.
Problem: The transfer cracks
Avery warns that these transfers are intended for normal wear rather than heavy stretching. Cracking can also be related to application or care. A highly stretchable garment is a reason to consider Avery’s separate stretchable-transfer product rather than 3279.
Why Is My Avery Transfer Peeling?
Peeling usually means something in the application or care process needs attention. Check that the garment is compatible, the iron or heat press used the 3279-specific settings, the surface allowed firm pressure, the transfer was applied evenly, and washing followed Avery’s care guidance.
If an edge lifts during the initial application, Avery’s dark-transfer instructions say to repeat the ironing steps. If peeling develops later, review the fabric, washing timeline, detergent, dryer heat, fabric softener use, and stretch before assuming the paper itself is the only cause.
Can You Cut Avery 3279 With a Cricut?
Avery says 3279 can be cut with scissors and is compatible with electronic and die-cutting machines. That makes a cutting machine useful when you want cleaner edges around detailed artwork.
However, this is not a complete Cricut Print Then Cut tutorial. Your exact registration, mat, blade, software, and print workflow should be checked against your machine’s current instructions before cutting an expensive transfer sheet.
For the cutting-machine side of the workflow, see our Cricut Explore Air 2 review.
Pros and Cons
Pros
- Made for dark fabric: the white-backed layer keeps designs and white areas visible against darker shirts.
- No mirroring: artwork prints in its normal orientation, which removes one common transfer-paper mistake.
- Inkjet-friendly home workflow: 3279 is made for standard inkjet printing.
- Iron or heat press: Avery publishes instructions for both application methods.
- Design support: Avery provides a 3279 template and Design & Print workflow.
- Cutting-machine compatibility: Avery says the sheet can be cut with scissors or compatible electronic/die-cutting machines.
Cons
- Visible transfer layer: white areas around the design remain visible unless trimmed away.
- Not for laser printers: the 3279 workflow is inkjet-only.
- Not intended for heavy stretch: Avery points users toward a separate stretchable-transfer product for that use.
- Application is technique-sensitive: heat, pressure, surface, fabric, and care can affect the result.
- Historical test showed uneven transferred color: the original Craft Ideas review reported mottling in some solid-color areas after ironing.
Who Should Buy Avery Dark Fabric Transfers?
Good fit if you…
- Have an inkjet printer.
- Make occasional custom T-shirts, totes, aprons, or similar cotton/cotton-blend projects.
- Need artwork to remain visible on dark fabric.
- Want to use a household iron or already own a heat press.
- Prefer a product with manufacturer templates and detailed support instructions.
Consider another option if you…
- Use a laser or sublimation printer.
- Need a highly stretchable garment application.
- Want an almost invisible transfer layer on a light shirt.
- Produce shirts at commercial volume and need a production-oriented transfer system rather than a home DIY sheet.
Is Avery Dark Fabric Transfer Paper Worth It?
For a beginner DIY project: it can be a practical fit because the no-mirror workflow is straightforward and Avery publishes clear iron and heat-press instructions.
For an occasional crafter: the five-sheet format and Design & Print support make sense when you need a few custom pieces rather than a large production run.
For a Cricut owner: cutting-machine compatibility can help reduce visible white borders, but the exact Print Then Cut workflow still needs to match your machine and software.
For a small seller: consider whether the transfer feel, edge visibility, application time, and consistency meet your product standard before relying on it for inventory.
For high-volume shirt production: this home-transfer format is unlikely to be the most efficient production workflow. Compare commercial transfer methods rather than assuming a consumer five-sheet pack will scale well.
The original Craft Ideas test did not recommend the product because of uneven transferred color and perceived value versus alternatives at that time. That historical verdict is worth preserving, but current buyers should weigh it alongside Avery’s present instructions, their own artwork style, and the fact that large solid-color designs may show application inconsistency more clearly than detailed artwork.
FAQ
What is Avery 3279?
Avery 3279 is the product number for Avery’s 8.5 x 11-inch printable Fabric Transfers for Dark Fabrics. Avery currently lists the retail pack as five matte sheets for inkjet printers and provides a matching 3279 template in Avery Design & Print.
How do you use Avery dark fabric transfers?
Print the design on an inkjet printer without mirroring it, trim around the design, peel off the backing, place the transfer image-side up on the garment, cover it with the supplied tissue, then apply it with Avery’s iron or heat-press instructions. Allow it to cool before removing the tissue.
Do Avery dark fabric transfers need to be mirrored?
No. Avery says 3279 dark transfers should print in the normal orientation. Mirroring is associated with Avery’s light-transfer workflow, where the transfer is applied face down.
Can you use a regular iron?
Yes. Avery supports a household iron with steam off and no water in the iron. Use a smooth, heat-resistant work surface rather than an ironing board and follow Avery’s timing for the transfer size.
Can you use a heat press?
Yes. Avery’s current dark-transfer specification is 320°F (160°C), light-to-medium pressure, for 30–45 seconds.
Which side do you print on?
Print on the printable transfer side using an inkjet printer, then peel away the backing before application. Because packaging construction can change, confirm the printable side using the instructions supplied with your current pack before loading an expensive sheet.
Can Avery dark transfers be used on white shirts?
They can be used when you specifically want the white-backed transfer effect, and Avery says the dark transfer can work on white or dark shirts when white should show through. For a more transparent result on white or light fabric, Avery’s light-transfer product is usually the more appropriate category.
How long should Avery dark transfers cool?
Avery’s current 3279 household-iron instructions say to cool the transfer for about 2–3 minutes with the tissue still in place before carefully removing it.
How soon can you wash the shirt?
Avery’s general current fabric-transfer care page, which includes 3279, says to wait 24 hours before washing. Then wash the garment inside out in cold water according to Avery’s care instructions.
Why is my Avery transfer peeling?
Possible causes include insufficient heat or pressure, an incompatible fabric, an unsuitable work surface, washing too soon, fabric softener, or other care issues. Review the product-specific instructions before adding more heat.
Are Avery dark transfers washable?
Yes, when applied and cared for according to Avery’s instructions. Avery says its fabric transfers are guaranteed to look good after 20 washes when the application and washing directions are followed. Treat that as a manufacturer guarantee rather than an independent Craft Ideas durability test.
Final Takeaway
Avery 3279 makes the most sense when you want a straightforward inkjet-to-dark-shirt workflow and understand the trade-offs of a white-backed transfer layer. The big practical wins are no mirroring, home-iron support, heat-press support, and easy access to Avery’s product-specific instructions.
The details that matter most are not marketing claims—they are the workflow: use an inkjet printer, print right-side up, trim carefully, remove the backing, apply the design face up, use the supplied tissue, follow Avery’s heat and pressure settings, and follow the 3279 care instructions afterward.
If you are still deciding among brands or transfer types rather than trying to use Avery 3279 specifically, [INTERNAL LINK: Best Transfer Paper for Shirts — anchor: compare our top transfer papers for shirts].