Yarn Spider Web Craft
Jump to:
Want to transform your living room or porch into a spooky lair this Halloween?
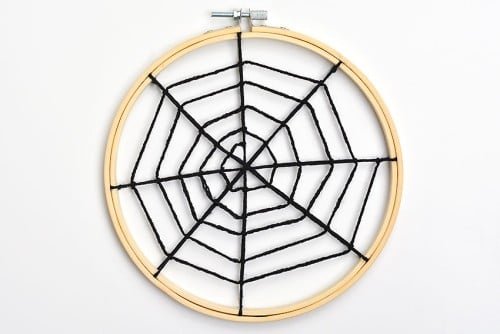
Giant, creepy, and beautiful yarn spider webs are one of the most effective and budget-friendly ways to decorate your home. Unlike cheap, synthetic webbing, a yarn web looks sturdy, intentional, and adds incredible texture to your spooky display.
Whether you need a small web for a wreath or a huge, dramatic installation across a doorway, the process is simple: all you need is some yarn, scissors, and a little space to work. This step-by-step tutorial will show you the easiest way to weave a realistic-looking spider web that can be used indoors or out. Let’s get crafting!

This post contains affiliate links. If you use these links to buy something we may earn a small commission which helps us run this website.
How to Make a Spider Web from Yarn
Materials:
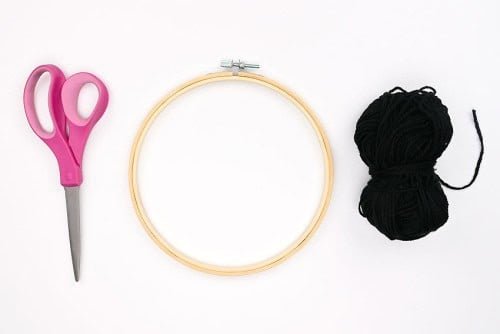
- Embroidery hoop
- Black acrylic yarn(or colour of choice)
Equipment:
Instructions:
Step 1: Find what you need
- Gather your supplies and materials.


Step 2: Make the base of the spider web
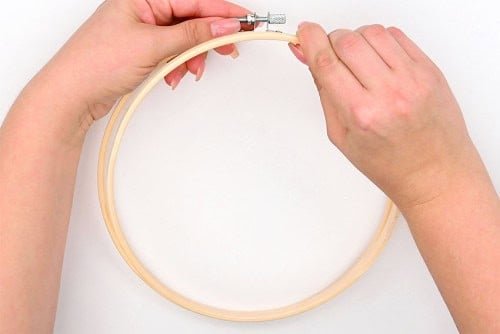
- Loosen the embroidery hoop by twisting the screw and remove the inner part of the embroidery hoop. You’ll be working on the inner hoop.


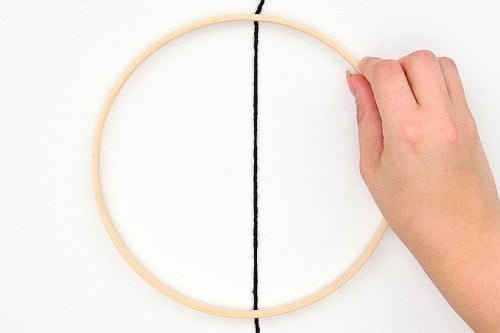
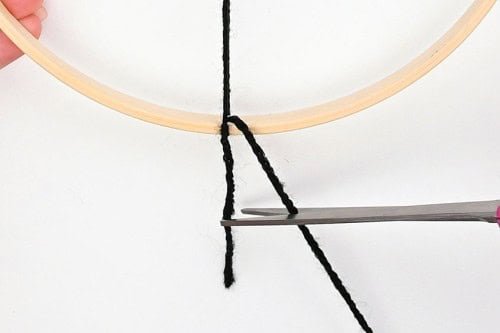
- Keep your yarn connected to the ball and place the hoop over a single layer of yarn so it goes straight up and down under the hoop.


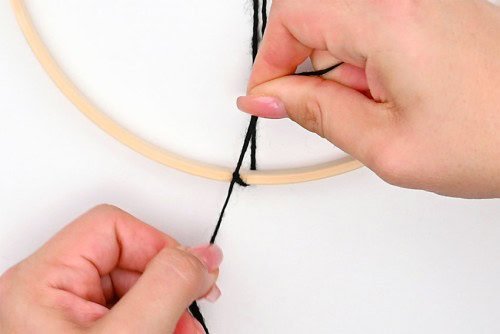
- Wrap the yarn down over the hoop so it makes a loop around the center. Tie a knot at the bottom to keep it in place.


- Cut off the yarn from the ball.


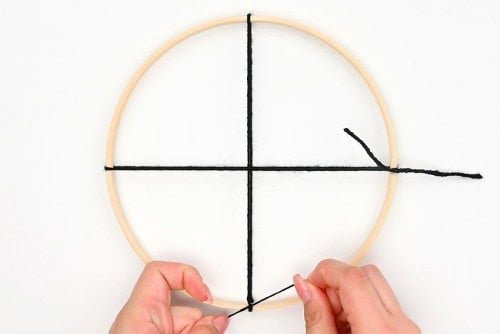
- Turn the hoop so that the previous line of yarn is horizontal. Tie another loop of yarn around the hoop, creating a + sign.Cut off this yarn close to the knot as well.


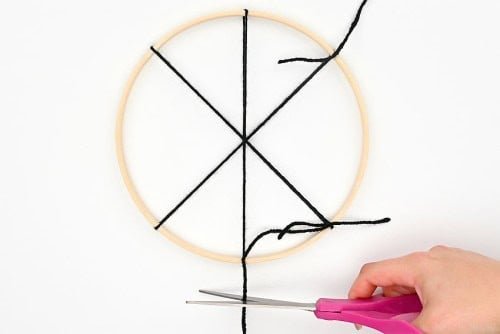
- Turn the hoop so that your yarn makes an “X” shape. Add another piece of yarn going straight up and down. Cut off the yarn.


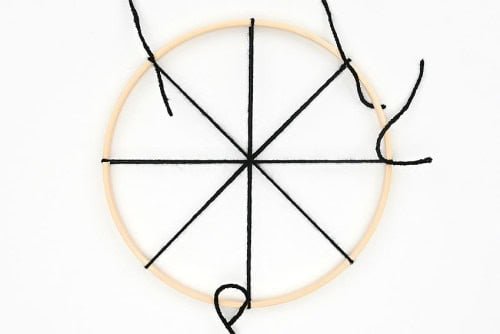
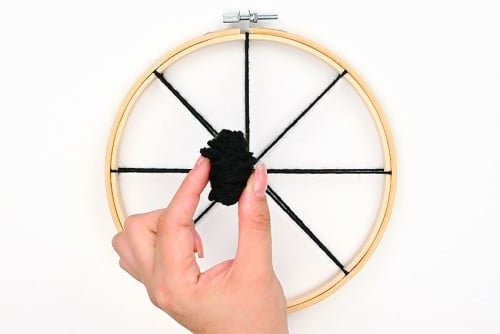
- Turn the hoop one last time and add one last piece of yarn. Your web base should look like 8 equal slices of pie.


Step 3: Prepare to tie the spider web
- Re-attach the inner embroidery hoop to the outer hoop. Tighten the screw to make it secure.


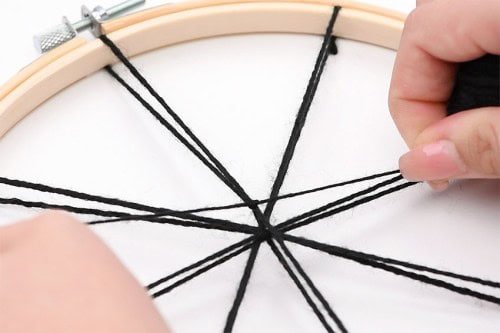
- Cut off the extra yarn at the knots. Flip the hoop over so that you’re working on the back.


- Roll a small ball of yarn until it’s about 1.5 inches wide and then cut it off from the main ball of yarn. This small ball makes it easier to weave the yarn in and out of the web.


Step 4: Weave the yarn around the web
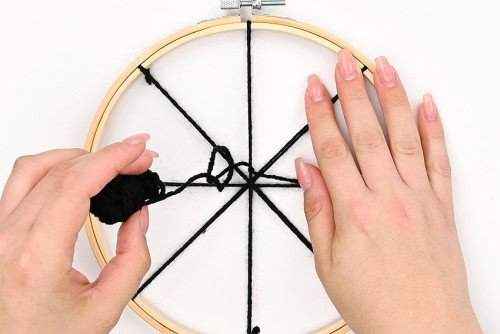
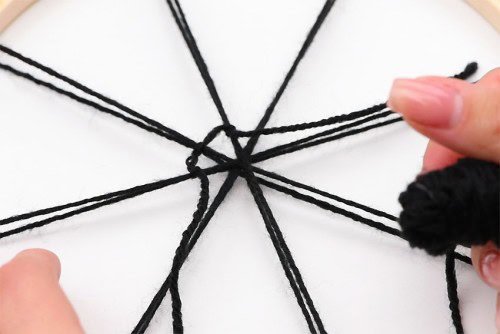
- Tie the end of the yarn ball around one of the strands on the embroidery hoop about 1/2 inch away from the center of the web. Pull it tight in a double knot.


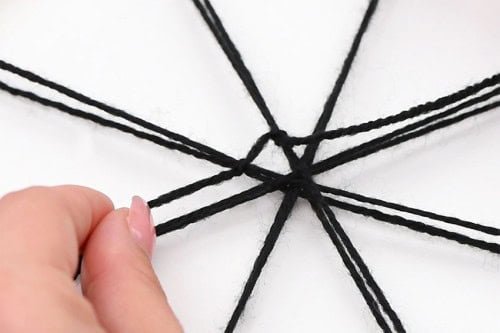
- Wrap the yarn around the strands to the left and make a single knot by pulling the yarn ball through the loop created.


- Pull to tighten the knot so that the yarn going from one strand to the next is taut.


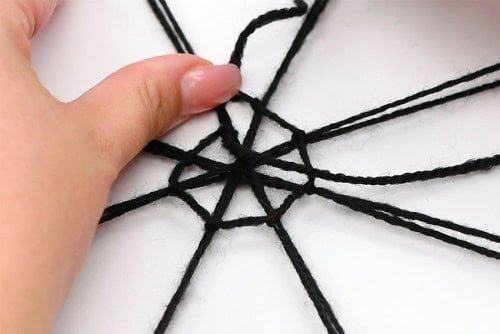
- Tie a single knot around the next set of strands, working counterclockwise. Again, make sure the thread is taut between the webs.


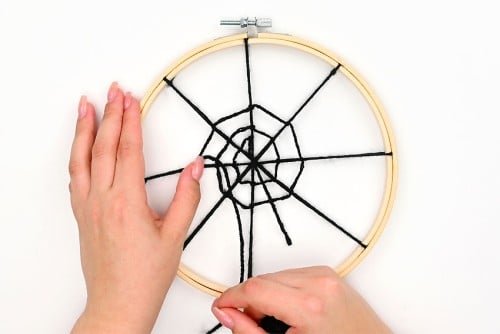
- Continuing tying knots around each next strand. When you get back to where you tied the first knot, move the next knot about 1/2 inch away from the last row.


- Continue working your way around the web, spacing out each row and adjusting the knots when necessary.


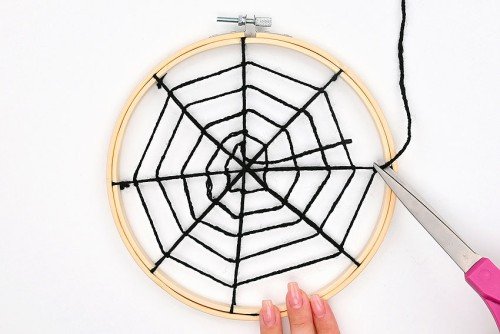
- Keep working counterclockwise until you’re near the outside of the hoop. When you reach the edge, tie a double knot for the last knot. Then cut off the extra yarn, both at the center of the web and at the outside, close to the knots.


- Your yarn spider web is complete!


Helpful Tips:
- You can tie the yarn clockwise or counterclockwise around the hoop — whatever feels most natural to you.
- Add a single layer of yarn (rather than tying it around the hoop) by tying it, taping it, or hot gluing it into place on the outside of the inner hoop.
- Use the same concept to make a giant yarn spiderweb (try using a hula hoop!) to hang in your window or across your porch. You can also skip the hoop and tape the base pieces in place while you tie the knots.

What type of yarn is best for making a yarn spider web?
We used acrylic yarn to make our yarn spiderwebs. This type of yarn is easy to work with, it’s inexpensive, and we really liked how it looked.
Cotton yarn might also work, but it does fray apart a lot easier, which can make it difficult to tie the knots. If you don’t want to use yarn you can also use embroidery floss, like we use for making string art, or even twine or macrame cord.

What size of embroidery hoop do you recommend for making a yarn spider web?
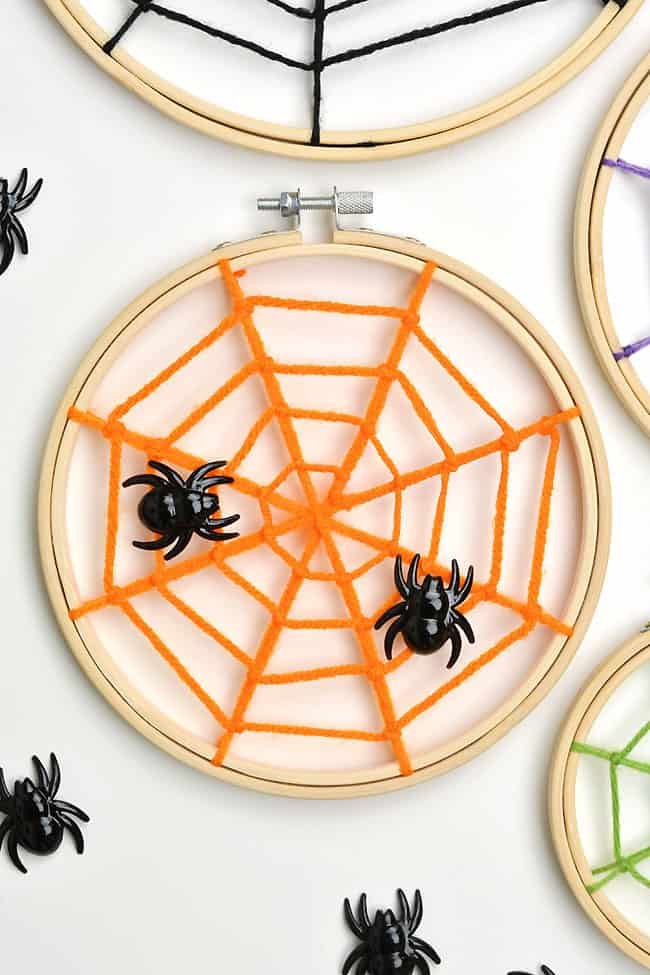
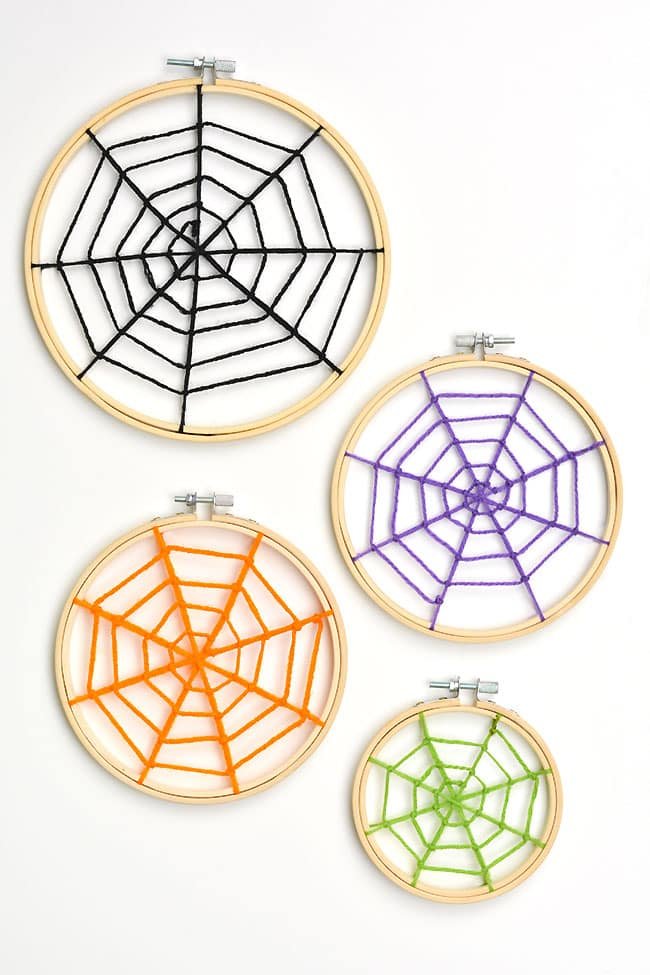
We used 3 sizes of embroidery hoops, with diameters of 4, 6, and 8 inches. You can choose whatever hoop size you like.
Larger hoops are easier for kids to use because of the bigger area to work in. The smaller the hoop, the more intricate the design. You can also space the rows apart more on the larger hoop, making it easier to work with.

What can I do with this DIY yarn spiderweb?
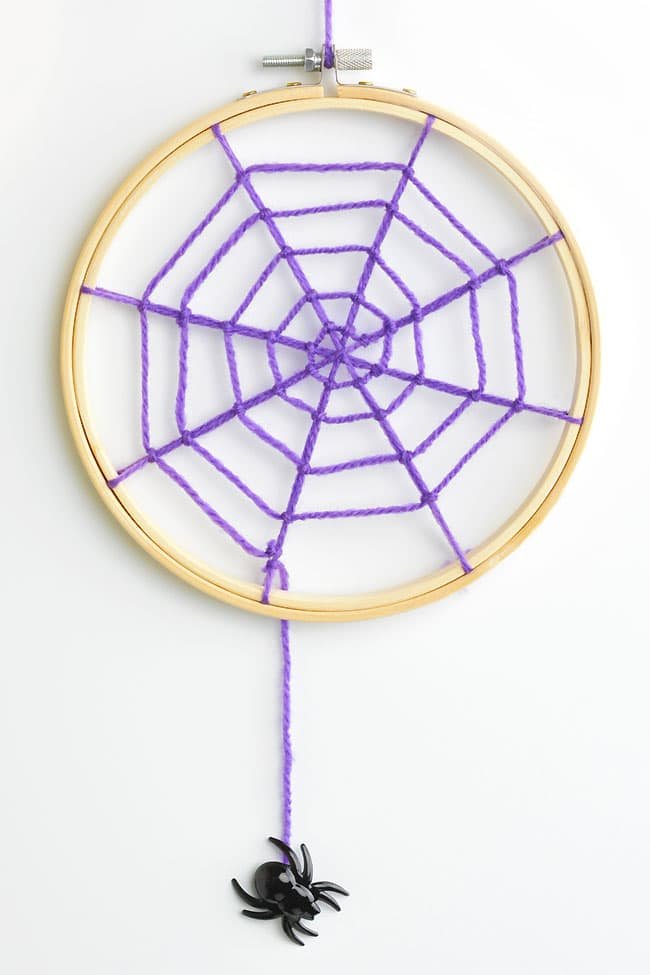
Tie yarn around the top center of the embroidery hoop and hang your yarn spiderweb in a window or even outside on a covered porch. You can also lean it in the windowsill or on a mantle or desk.
You can even add a spider to the web for an extra spooky touch! Buy a plastic spider (ours are from the dollar store) or make your own small pom pom spider! You can glue or tie the spider to the web, or have it dangling down from a length of yarn.
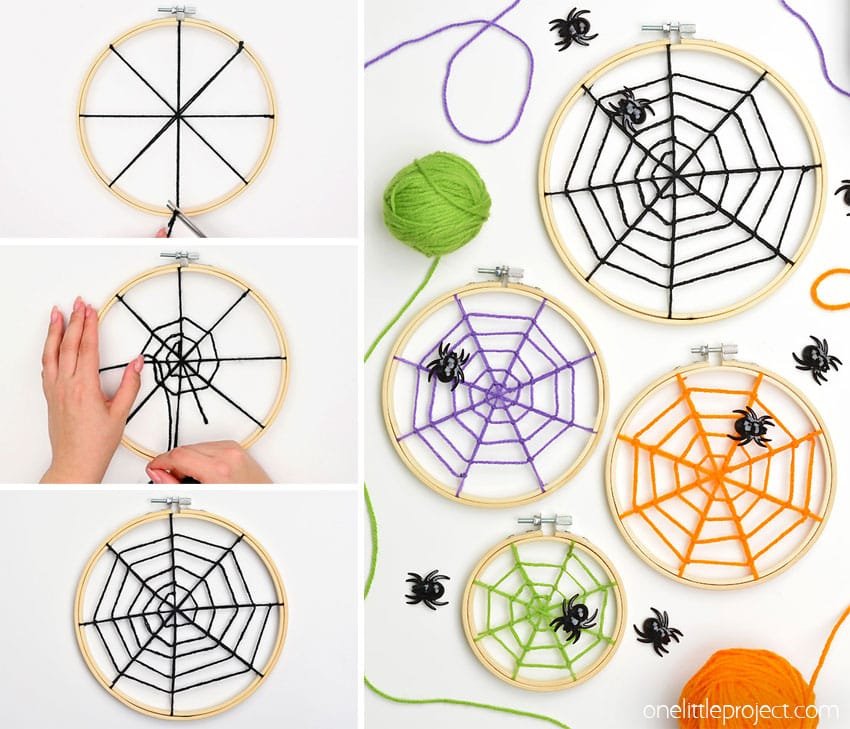

This yarn spider web is a great way to add a creepy crawly and slightly spooky touch to your Halloween decorations. It’s a simple weaving craft that’s so much fun to make! It also works well as a read-along craft for a book like Charlotte’s Web.


