
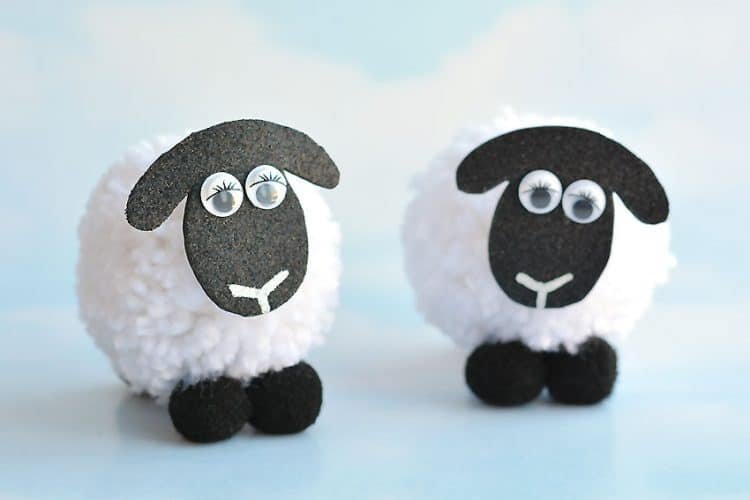
Pom pom sheep are easy to make with yarn, black craft foam, small black pom poms, googly eyes, and glue. The Craft Ideas version does not require a pom-pom maker: the fluffy body is made by wrapping yarn around your fingers, tying the center tightly, cutting the loops, and trimming the yarn into a round ball.
This tutorial keeps the original hand-wrapped method and adds clearer guidance for shaping the body, positioning the feet, choosing yarn, and fixing the most common problems.
Pom Pom Sheep — Quick Overview
Jump to:
| Project detail | What to expect |
|---|---|
| Difficulty | Beginner-friendly with adult help for hot glue and sharp scissors |
| Pom pom method | Wrapped around fingers; no pom-pom maker required |
| Body | White chunky yarn in the original project |
| Face | Black craft foam, googly eyes, and a paint-pen mouth |
| Feet | Four small black pom poms |
| Best use | Spring crafts, Easter displays, farm-animal themes, or year-round decor |
Supplies You’ll Need
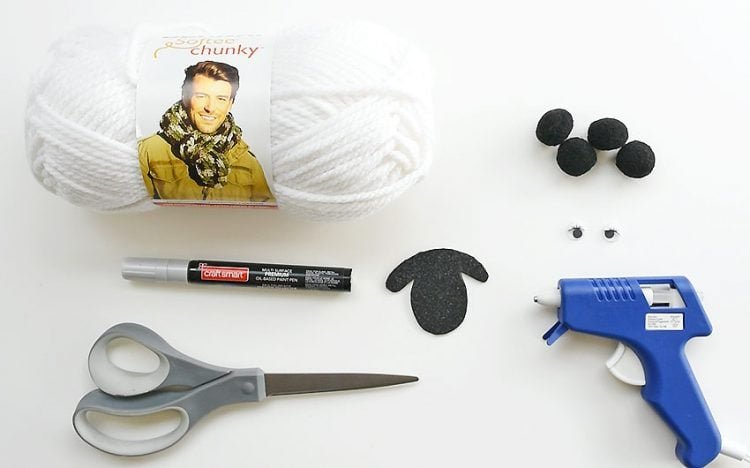
- White chunky yarn
- Four small black pom poms, about 1 inch in the original project
- Black craft foam; the original project used sparkly foam
- Two googly eyes
- Silver or white paint pen for the mouth
- Hot glue gun and glue sticks
- Sharp scissors
4 black pom poms
Black sparkly craft foam
2 Googly eyes
Silver paint pen
Glue gun
Scissors
Chunky yarn makes the body fill out with fewer wraps. Regular-weight yarn can also work, but it usually needs more wrapping before the pom pom feels dense enough.
How to Make Pom Pom Sheep
Step 1: Prepare the Center Tie
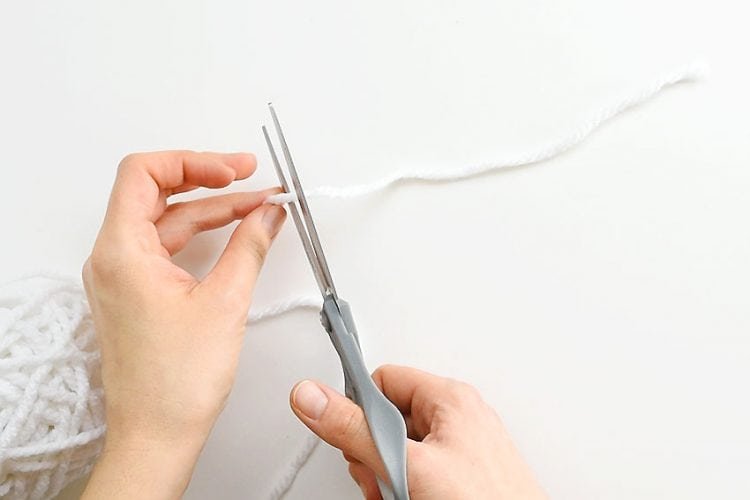

Cut a piece of yarn about 8 inches long. Slide it between your middle fingers before you start wrapping the main yarn. This short piece becomes the tie that holds the center of the pom pom together.
Position it where you can reach both ends after wrapping. A secure center tie is one of the most important parts of the project because loose yarn here can make the finished body fall apart during trimming.
Step 2: Wrap the Yarn Around Your Fingers
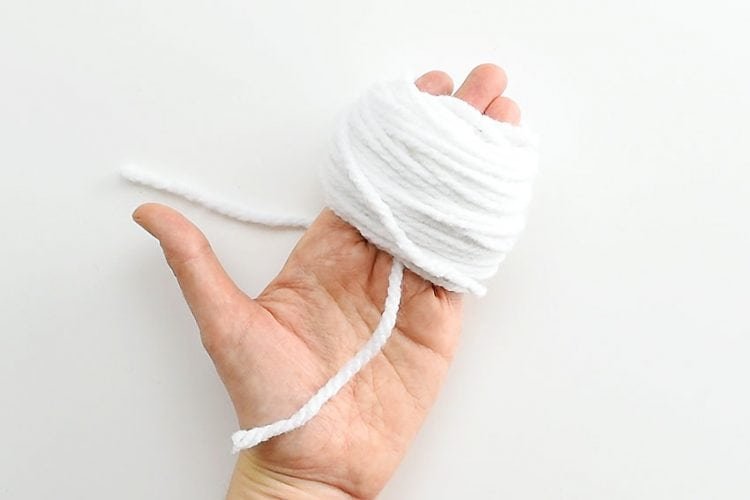
Wrap the white yarn around your fingers until you have a thick bundle. The original project used chunky yarn and wrapped it about 70 times. With regular-thickness yarn, the original instructions suggested roughly 130 wraps.
Those numbers are useful project references, not universal rules. Yarn thickness, hand size, and the size of sheep you want will change how many wraps are needed. Stop when the bundle looks full enough to make a dense pom pom after cutting and trimming.
Step 3: Tie the Center Before Removing the Yarn
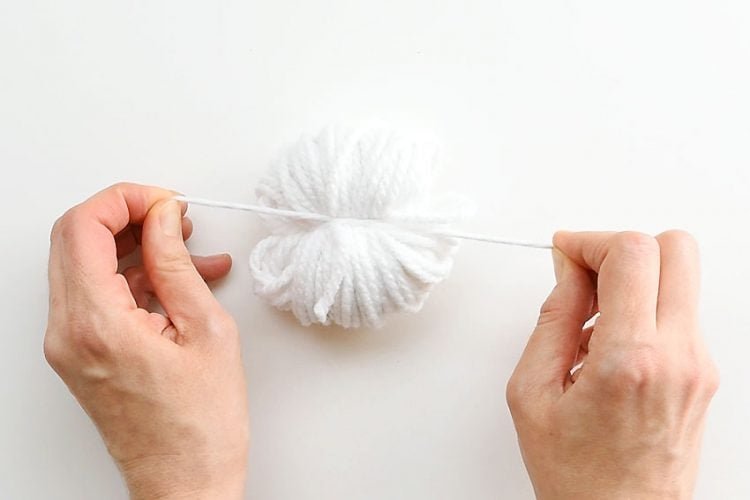
Bring the two ends of the 8-inch center tie around the wrapped bundle and tie them once while the yarn is still on your fingers. Slide the bundle off carefully, pull the center tie tight, and secure it with a double knot.
The tighter the center is without breaking the yarn, the more stable the finished pom pom will be.
Step 4: Cut All the Yarn Loops
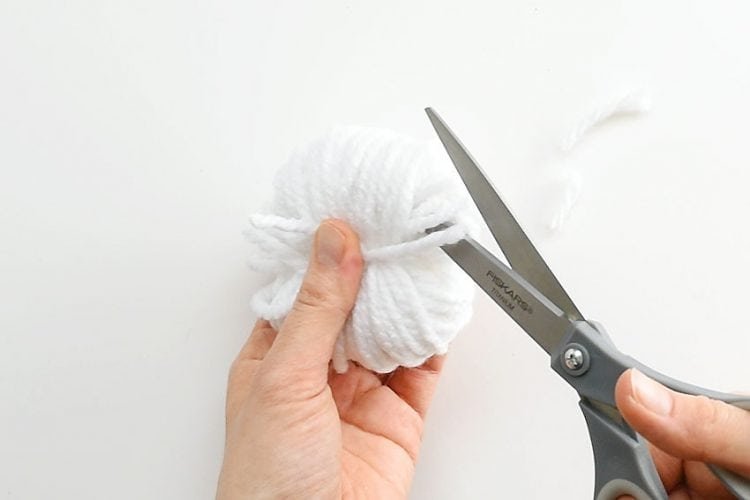
Use sharp scissors to cut through every loop around the outside of the bundle. Work slowly so you do not accidentally cut the center tie.
The pom pom will look uneven and shaggy at this stage. That is normal. The round sheep body comes from trimming after every loop has been opened.
Step 5: Trim the Pom Pom Into a Round Body
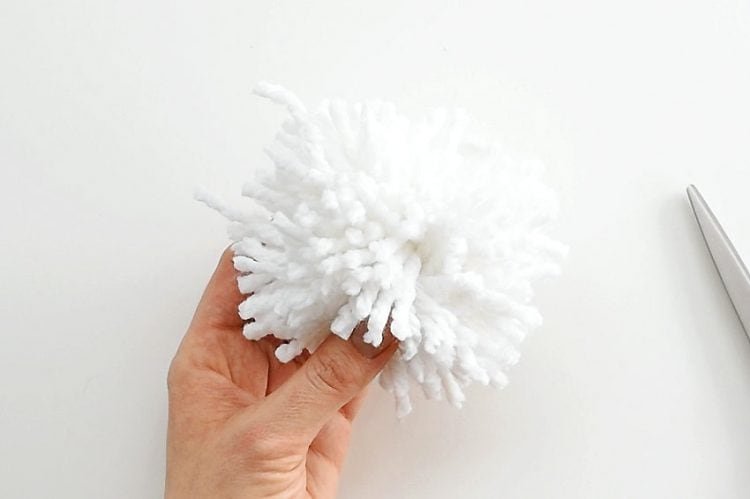
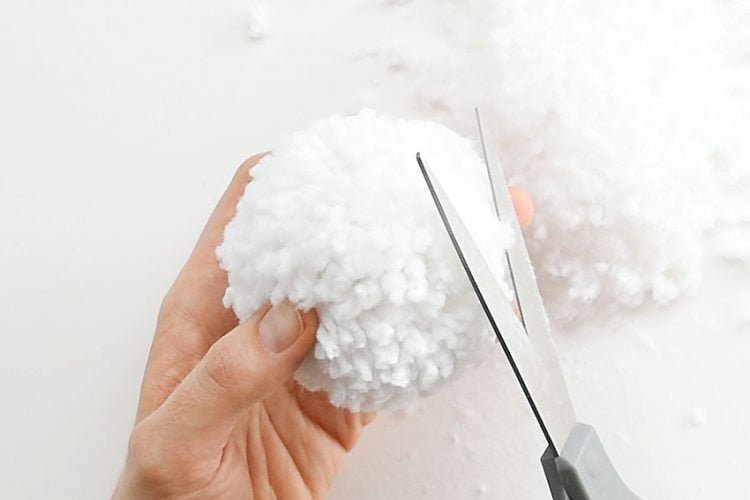
Trim the longest strands a little at a time. Rotate the pom pom as you work, fluff it with your fingers, and keep checking the shape from different angles.
Avoid trying to make it perfectly round in one pass. Small trims are easier to control and reduce the chance of making one side noticeably shorter than the other.
Step 6: Make the Sheep’s Face
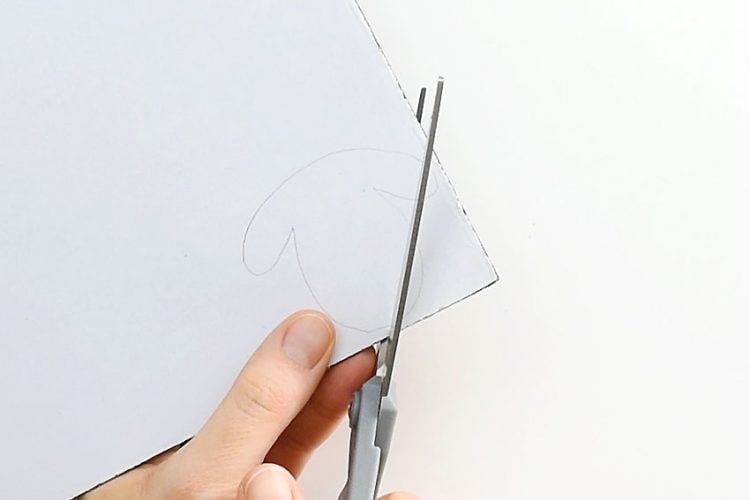
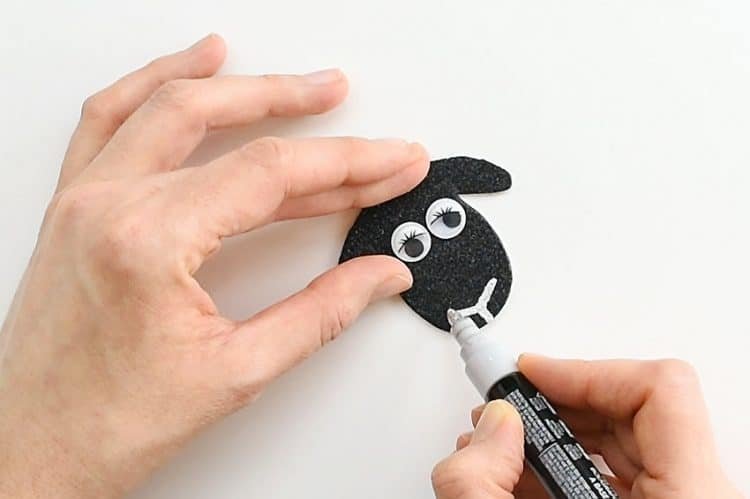
Draw a simple sheep-head shape on black craft foam and cut it out. The original project used a face approximately 2 inches from top to bottom and about 2.5 inches wide.
Add two googly eyes and draw a small mouth with a silver or white paint pen. You do not need a printable template for this method; a simple rounded face with small ear points works well and can be adjusted to match the size of your pom pom.
Step 7: Make the Feet
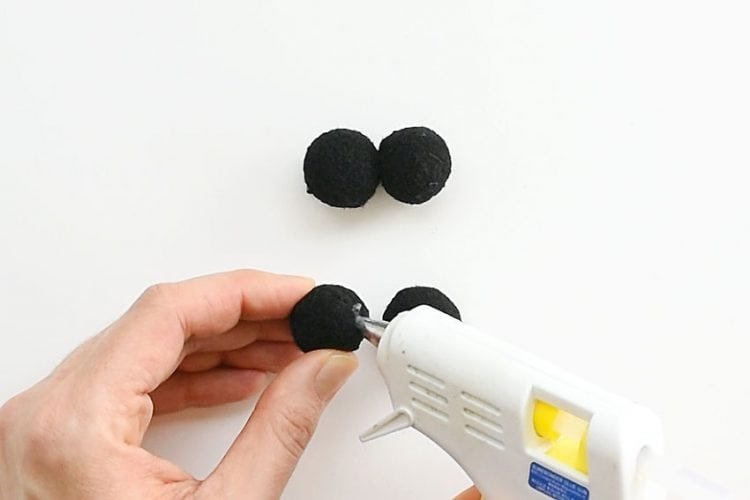
Use four small black pom poms for the feet. Glue two together for the front pair and two together for the back pair.
Let the glue begin to set before placing the sheep body on top. Keeping the feet in pairs makes positioning easier than trying to glue four loose pom poms underneath at once.
Step 8: Position and Glue the Body
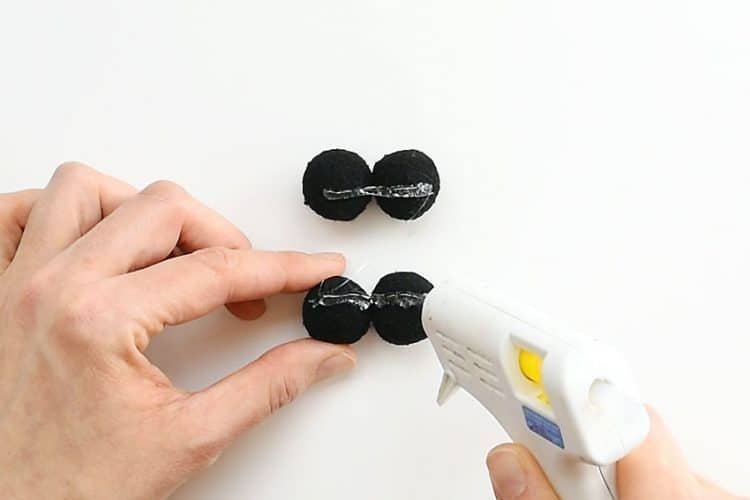
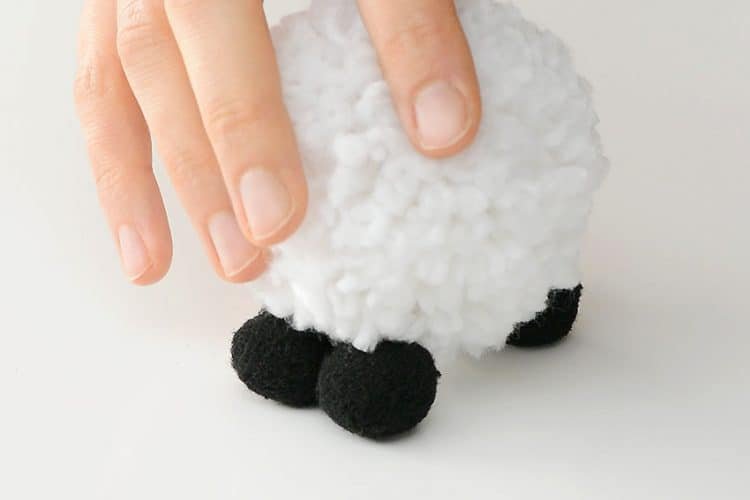
Place the white yarn pom pom on top of the two foot pairs before adding glue. Adjust the front and back feet until the sheep sits level and does not tip forward or backward.
Once the position looks balanced, glue the yarn body to the feet. A small amount of glue at the contact points is usually easier to hide than a large bead around the edges.
Step 9: Attach the Face
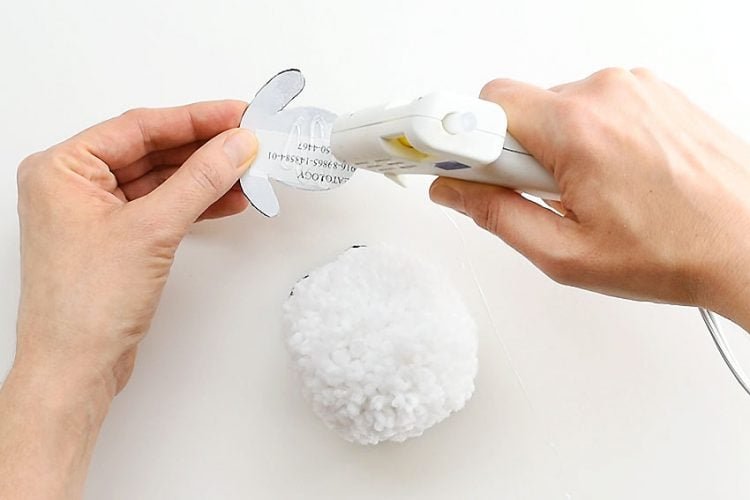
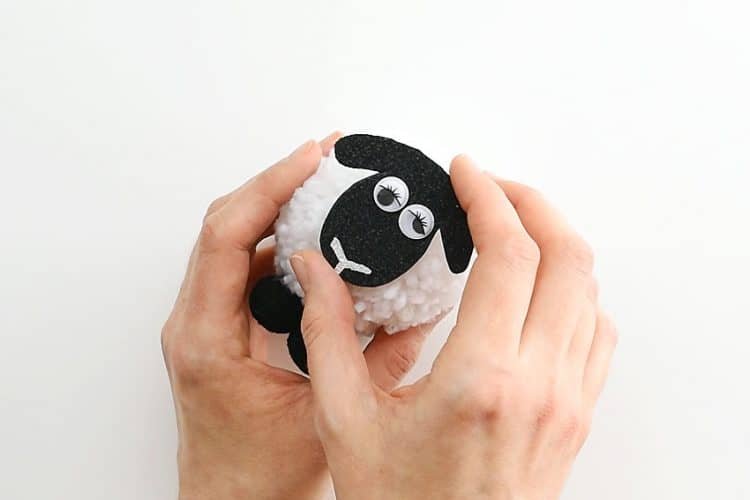
Part the yarn slightly where the face will sit so the foam can contact the denser center of the pom pom instead of only loose surface fibers. Add glue to the back of the foam face and press it into place.
Hold it steady until the adhesive grabs. The face adds weight to the front of the sheep, so check the foot position again after attaching it.
Step 10: Fluff, Balance, and Finish
Fluff the yarn around the face and feet, then give the body one final light trim. Set the sheep on a flat surface and make small adjustments if it leans.
If you are making several sheep, slight differences in face shape and body size make the finished group look more handmade rather than less polished.
What Yarn Works Best for Pom Pom Sheep?
Chunky white yarn is the easiest choice for this particular pom pom sheep because it builds a full body quickly. It also creates a visibly fluffy texture that suits a sheep.
Thinner yarn can work too. Expect to wrap more times and spend a little longer trimming. Very smooth yarn creates a neater surface, while softer or fuzzier yarn makes the sheep look more woolly.
If you enjoy yarn animals, the same basic pom-pom shaping idea also appears in the Pom Pom Hedgehogs project.
Do You Need a Pom-Pom Maker?
No. The original Craft Ideas sheep is made entirely by wrapping yarn around your fingers.
A pom-pom maker is optional. If you already own one, use it to make a dense white pom pom, trim it round, and then continue with the same foam face and black-pom-pom feet.
The hand-wrapped method is useful when you want to start immediately without buying another tool. A maker can be more repeatable when you want a flock of sheep that are close to the same size.
How to Make the Pom Pom Round and Full
- Tie the center tightly. A loose center makes trimming difficult and can let strands pull free.
- Use enough wraps. A sparse bundle cannot become a dense ball just by trimming.
- Cut every loop. Hidden loops can make one side look flat.
- Trim gradually. Rotate the pom pom and take off small amounts from the longest areas.
- Fluff between cuts. New long strands often appear after the yarn is moved around.
- Stop before it gets too small. Chasing perfect symmetry can shrink the body more than intended.
Hot Glue vs Craft Glue
The original project uses a hot glue gun because it bonds the foam and small pom poms quickly. Hot glue should be an adult step when children are helping.
A strong craft glue can be a lower-heat alternative, but it usually needs more drying time and may require the pieces to be supported while they set. Whichever adhesive you use, start with a small amount so dried glue does not become part of the visible design.
Common Problems and Fixes
The Pom Pom Starts Falling Apart
The center tie is probably too loose or was damaged during cutting. Tie the center as firmly as possible before trimming and keep the scissors away from the center knot.
The Body Looks Flat or Sparse
Add more wraps the next time, especially when using thinner yarn. For the current pom pom, fluff the strands and trim only the longest pieces instead of trying to remove a large amount of yarn.
The Sheep Tips Forward
The foam face adds weight to the front. Test the position of both foot pairs before gluing the body, and move the front pair slightly forward or the back pair slightly backward until the sheep balances.
The Face Will Not Stay Attached
Loose surface yarn does not give glue much to grip. Part the yarn and attach the foam closer to the dense center of the pom pom.
The Face Looks Too Large
Scale the foam shape to the pom pom rather than treating the original dimensions as mandatory. The original face was about 2 by 2.5 inches, but a smaller body needs a smaller face.
Easy Pom Pom Sheep Variations
- Use cream, gray, brown, or black yarn for different sheep colors.
- Make several sizes and arrange them as a small flock.
- Use plain black felt instead of sparkly craft foam for a softer look.
- Add a hanging loop to turn a lightweight sheep into an ornament.
- Use the finished sheep in a spring, Easter, or farm-themed display.
For more small yarn animals, try the DIY Pom Pom Fish or DIY Pom Pom Bunny. You can also browse the Yarn Craft collection.
Frequently Asked Questions
How Do You Make a Pom Pom Sheep?
Wrap white yarn around your fingers, tie the center tightly, cut the loops, and trim the yarn into a round pom pom. Add a black craft-foam face with googly eyes, make two pairs of feet from four small black pom poms, then glue the body, feet, and face together.
How Do You Make a Pom Pom Without a Pom-Pom Maker?
Wrap yarn around your fingers, use a separate short piece of yarn to tie the middle, slide the bundle off your hand, tighten the center knot, cut every loop, and trim the strands into a ball. This is the method used for the sheep body in this tutorial.
How Many Times Should You Wrap the Yarn?
The original project wrapped chunky yarn about 70 times and suggested roughly 130 wraps for regular-thickness yarn. Treat those as starting points. Yarn thickness, hand size, and desired pom-pom size all change the number of wraps needed.
What Yarn Is Best for a Pom Pom Sheep?
Chunky white yarn is especially convenient because it creates a dense, fluffy body with fewer wraps. Regular-weight yarn also works but usually needs more wrapping. Choose a yarn that trims cleanly and has the woolly texture you want.
Can Kids Make Pom Pom Sheep?
Children can help with wrapping yarn, fluffing the pom pom, choosing the face, and positioning pieces. Sharp scissors, hot glue, googly eyes, and small pom poms need age-appropriate supervision. An adult should handle hot glue and any cutting a child cannot safely control.
Can You Use Felt Instead of Craft Foam?
Yes. Black felt can replace craft foam for the face. Felt is softer and lighter, while craft foam keeps a more rigid shape. Either material works if the adhesive you use bonds it securely to the yarn.
Final Takeaway
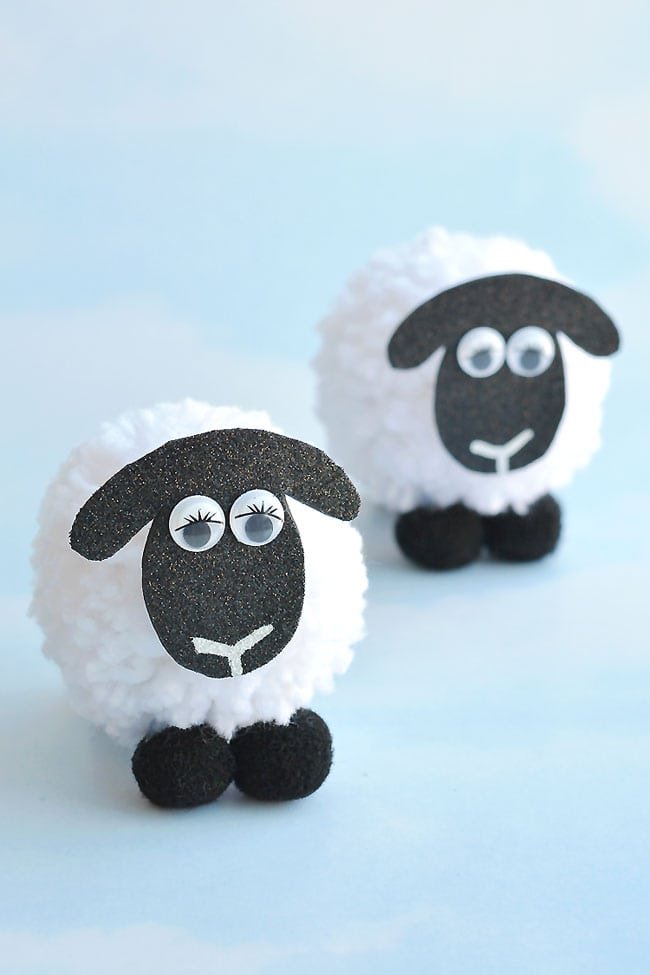
The most important parts of a good pom pom sheep are a tightly tied yarn center, gradual trimming, and testing the feet before gluing. The original finger-wrapped method is simple, needs no special pom-pom tool, and leaves plenty of room to change the yarn color, face shape, or finished size.