DIY Macrame Plant Hanger
Add texture and charm to your space with a DIY macrame plant hanger! It’s an easy way to get that boho-chic vibe in any room. Can’t you picture a cute plant swinging in a handmade macrame hanger, all thanks to your crafty skills?
These hangers are SO EASY to make. You only need a few supplies and a bit of time. Plus, I’ll guide you with photo and video tutorials. You’ll learn three simple knots (they’re a piece of cake!) and soon enough, you’ll have a super cute hanging planter to show off. Let’s get knotting!
This post contains affiliate links. If you use these links to buy something we may earn a small commission which helps us run this website.
How to Make a Macrame Plant Hanger
Materials:
- Wooden ring(2 inch diameter)
- 4mm Natural macrame cord
Equipment:
-
Tape measure(or ruler)
Check Out The Video Tutorial:
Instructions:
Step 1: Find what you need
-
Gather your supplies and materials.
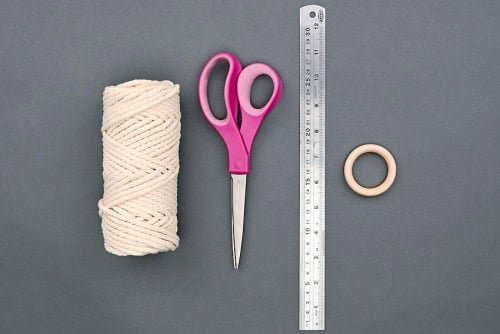

Step 2: Cut cords and make a wrapping knot
-
Cut 8 pieces of 4mm macrame cord to each be 120 inches (10 feet) long.
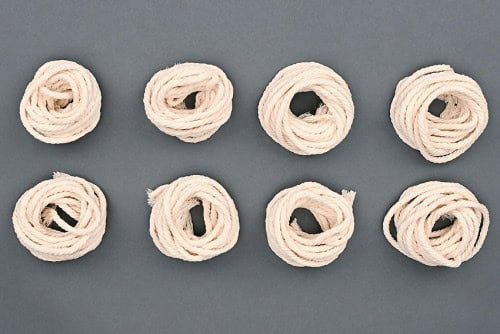

-
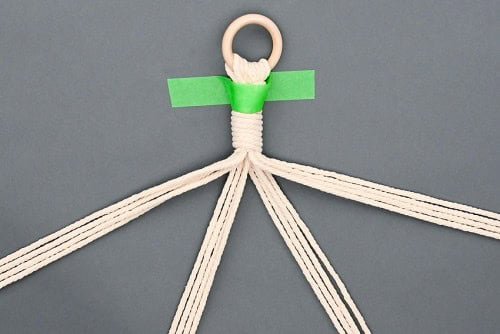
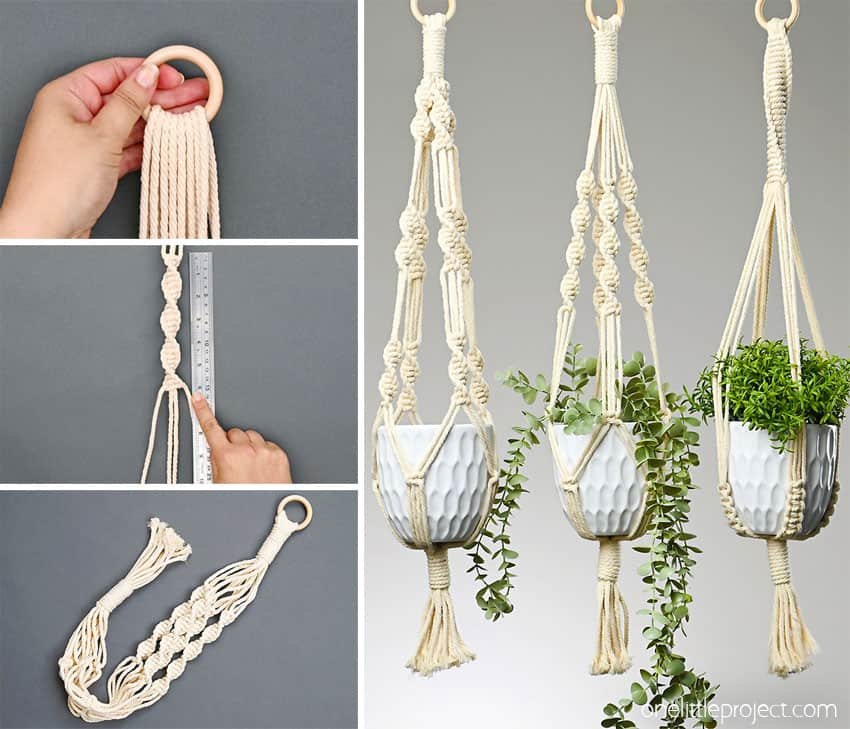
Group the cords together and pull one side of the cords through the wooden ring until the ends meet.The middle of the cord should be on the ring and you’ll have 16 even cords hanging down.
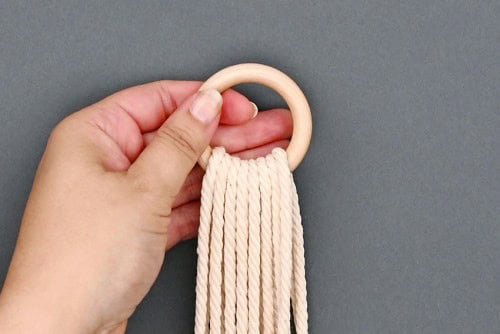

-
Cut a 45 inch (3.75 feet) piece of cord to make a wrapping knot (also called a gathering knot) below the ring.
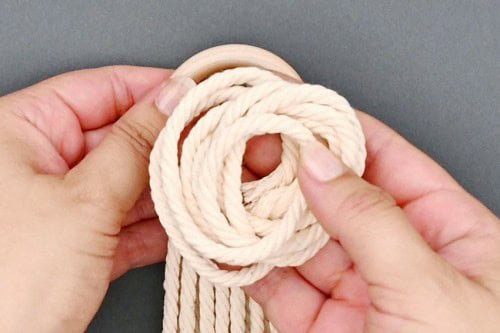

-
Start by placing one end of the cord near the top of the ring. Bring the cord down, by about 6 inches, then back up to the ring again, creating a loop. Then bring the long cord across the top horizontally, just under the ring.
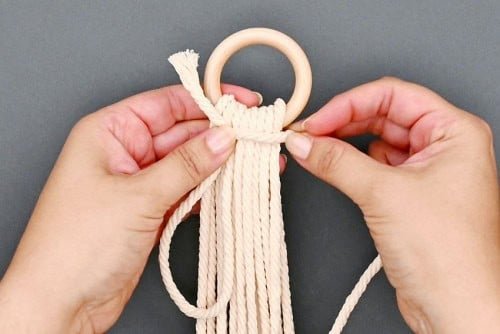

-
Wind the long end of the cord around the 16 cord bundle. Wrap tightly and don’t overlap the cords.
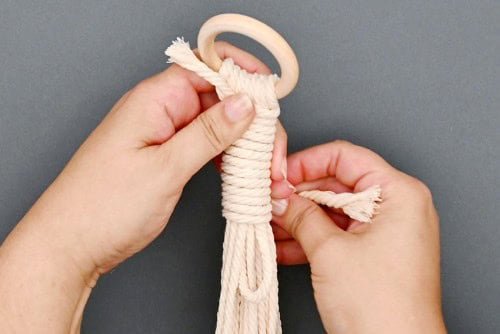

-
When you get near the end of the cord, bring it through the bottom loop. Then pull up on the cord at the top.
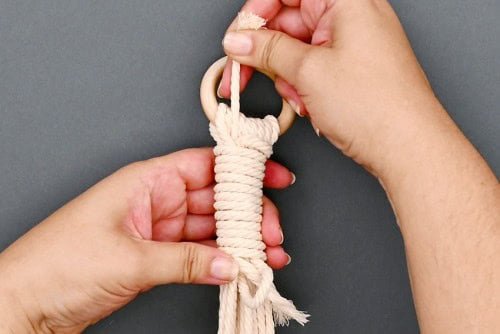

-
Pull until the bottom cord disappears inside the wrapping knot. Then cut off the excess cord at the top, as close to the wrap as possible.
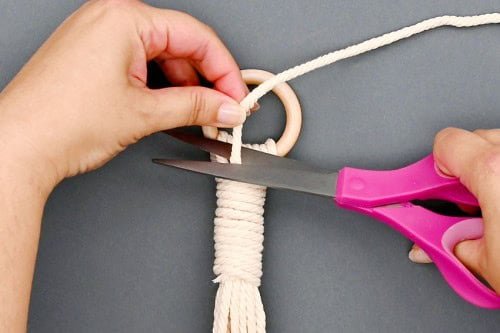

-
Tape your cords to your working surface.We’ll be making knots with 4 bundles of 4 cords, working on one bundle at a time.

Step 3: Tie half square knots
-
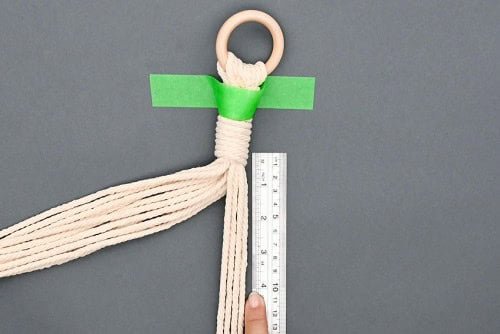
Move 3 bundles out of the way and start with the cords on the right (13, 14, 15, and 16 when counting the cords left to right).The first knot will be made 4 inches down from the bottom of the wrapping knot.

-
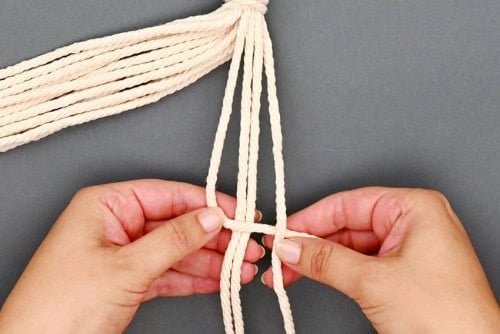
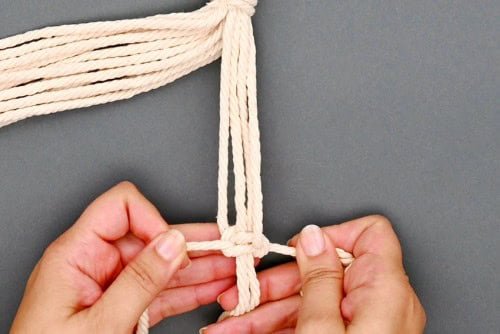
Begin making a half square knot, also called a spiral knot.To do this, place the left cord of this 4 cord bundle (cord 13) over the middle 2 cords (14, 15) and under the right (16), leaving a loop on the left.

-
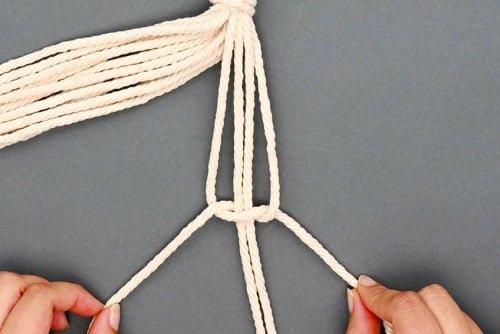
Bring the right cord (16) to the left under the middle cords, pulling it up through the loop.

-
Repeat the same half square knot below and pull it tight against the first knot.

-
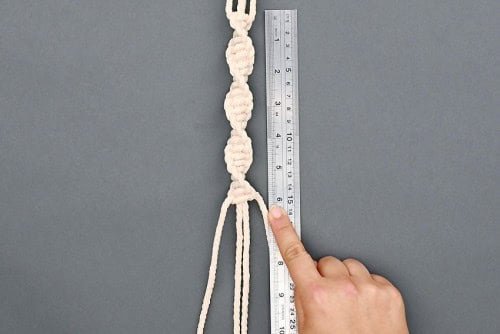
Continue until you’ve made approximately 24 knots, or until the knots make a section about 6 inches long. These knots will naturally spiral.

Step 4: Make a square knot
-
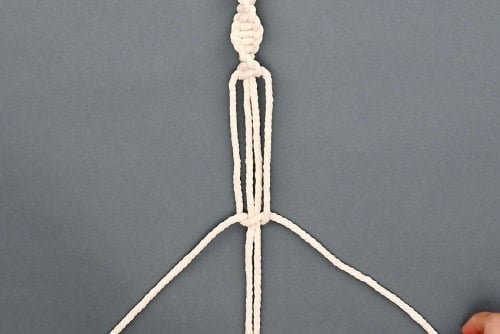
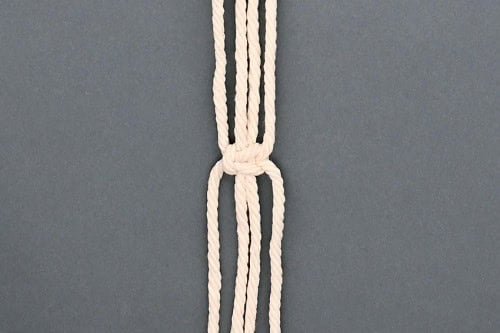
Skip down another 4 inches and make the first half of a square knot (the same half square knot you made above).

-
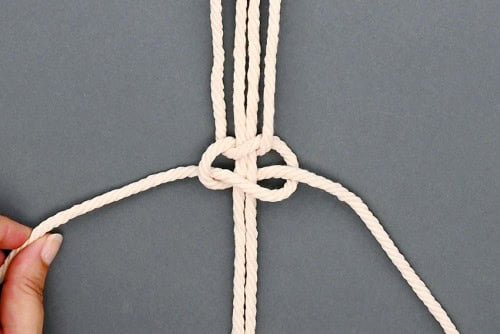
Continue the square knot by bringing the right cord over the middle cords and under the left.


-
Then bring the left cord under the middle cords and up through the loop to the right.

-
Pull the cords tight against the first half of the knot.This completes your square knot.

Step 5: Repeat knots on the other bundles of cords
-
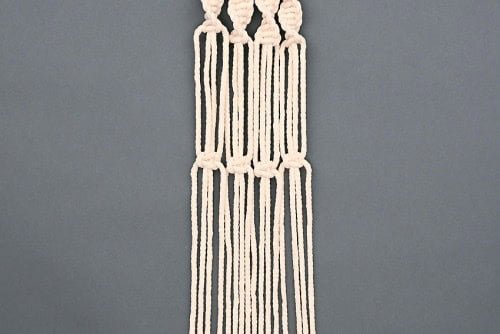
Repeat Steps 3 and 4 on the other 3 bundles.You can measure with a ruler for the spacing on these bundles as well, or simply compare the spacing to the first bundle.

Step 6: Connect the bundles
-
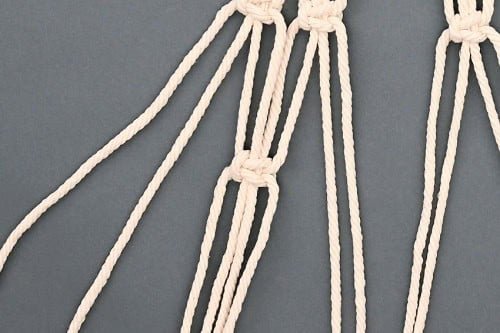
Connect the first and second bundles with an alternating square knot, about 2-1/2 to 3 inches below the last knots.Use the right 2 cords of the leftmost bundle (cords 3 and 4) and the left cords of the second bundle (cords 5 and 6).

-
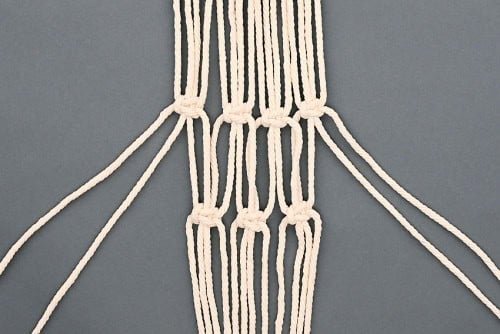
Make 2 more square knots to connect the bundles at the same length as the previous knot.For the second knot use cords 7, 8, 9, and 10. For the third knot, use 11, 12, 13, and 14.You should have 3 square knots in the middle with 2 loose cords on the left (1, 2) and the right (15, 16).

-
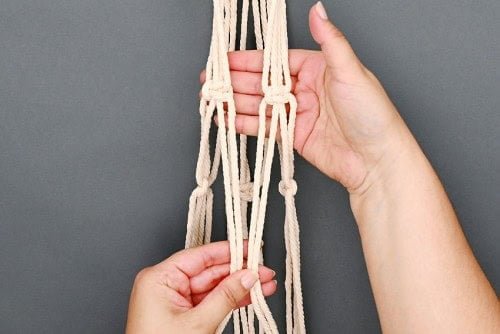
Now bring the unconnected cords in towards the middle.The cords that were previously on the very left and right should be in the center.

-
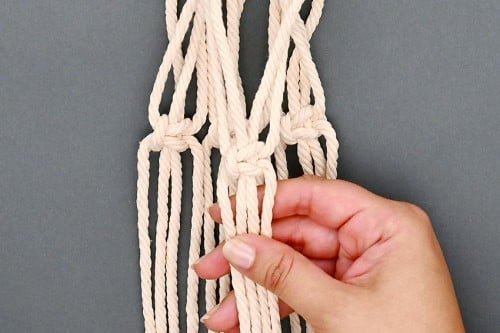
Make another square knot with these 4 cords, tying it at the same height as the other square knots.

Step 7: Finish with a wrapping knot
-
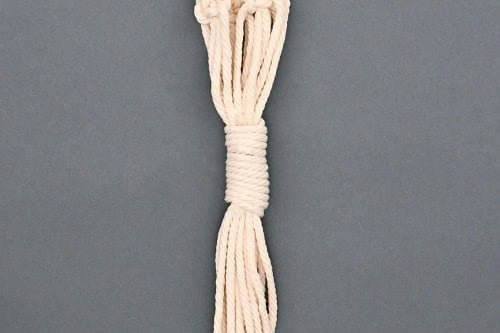
Cut another 45 inch cord and make another wrapping knot around all the cords, about 3 inches below the last square knots.Your gathering knot should be between 1 to 2 inches long.

-
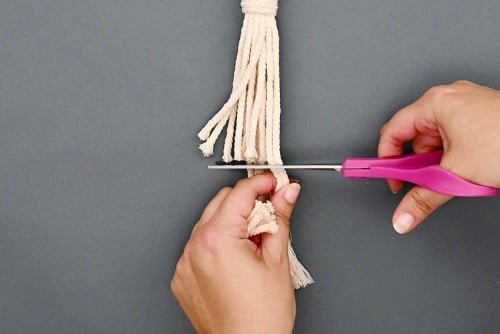
Trim the ends of the cords to be even, creating a fringe about 4 inches long (or another length of your choice).Leave the cords as is, or comb them out with a fine tooth comb or a wire pet brush to create a fringe.

-
Your macrame plant hanger is complete!
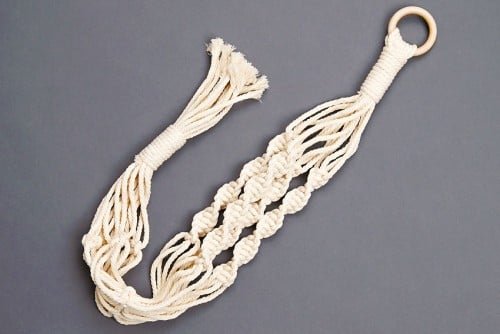

-
Now hang it up and place your favourite plant in the planter and enjoy!
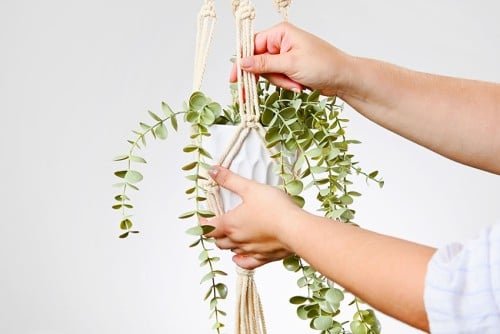

Helpful Tips:
- Use two simple knots (a half square knot and a square knot) to make variations of these macrame plant hangers. Different combinations of knots will give you many distinct patterns!
- We recommend comparing your knots one last time before making the final gathering knot. Lift your work and let it hang freely to see where the knots fall. It’s totally fine to go back and redo any knots that need adjustment!

What size macrame plant hanger does this pattern make?
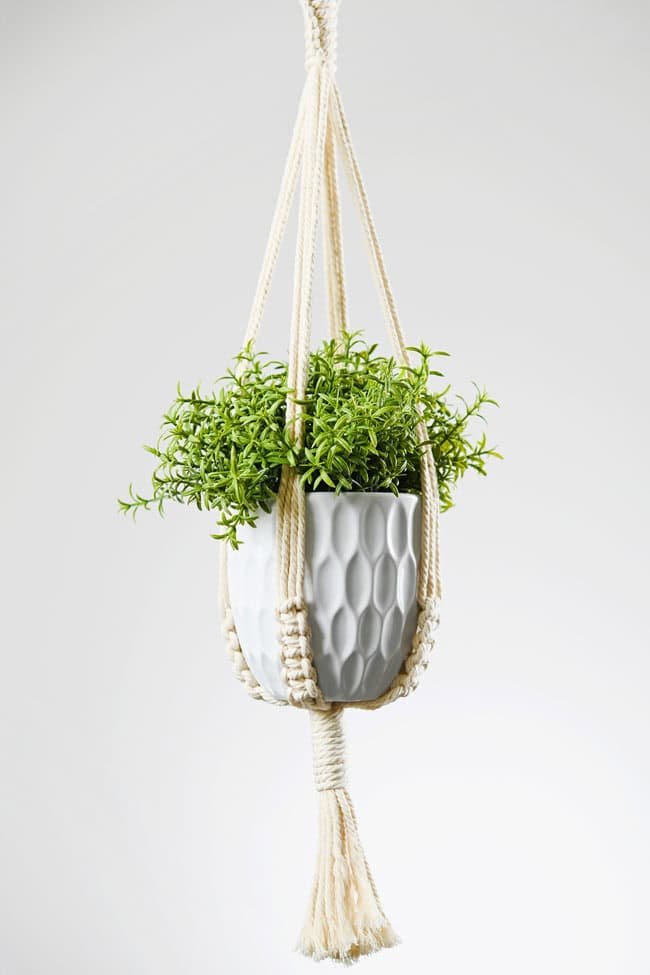
By following our exact instructions you should have a plant hanger that’s about 30 inches long total before adding the plant pot. These hangers are ideal for a pot with a 5 inch diameter.
If you want to fit a larger pot you can start with longer cords. Then test your pot in the plant hanger and tie the final gathering knot below where you’d like the plant pot to sit.
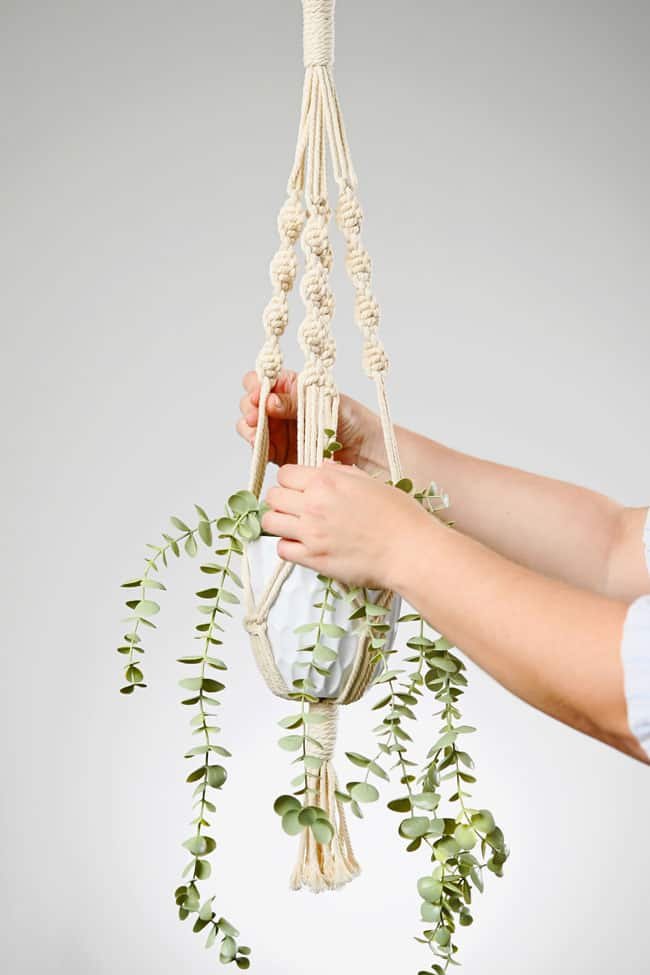

What type of pots are best for macrame plant hangers?
We suggest placing a pot in the planter that doesn’t have draining holes. If your plant pot has a draining hole, the water will run down the hanger and stain it, not to mention damage whatever is underneath it.
However, most plants need a draining hole so that they don’t rot. We recommend leaving the plants in their nursery pot and then placing this inside the larger pot. You can elevate the plant with a small lid or some rocks to keep it out of the drained water.
Or if you don’t have a green thumb, these hanging planters look great with artificial plants. You can get some beautiful and inexpensive faux plants and they won’t require any water or sunlight!
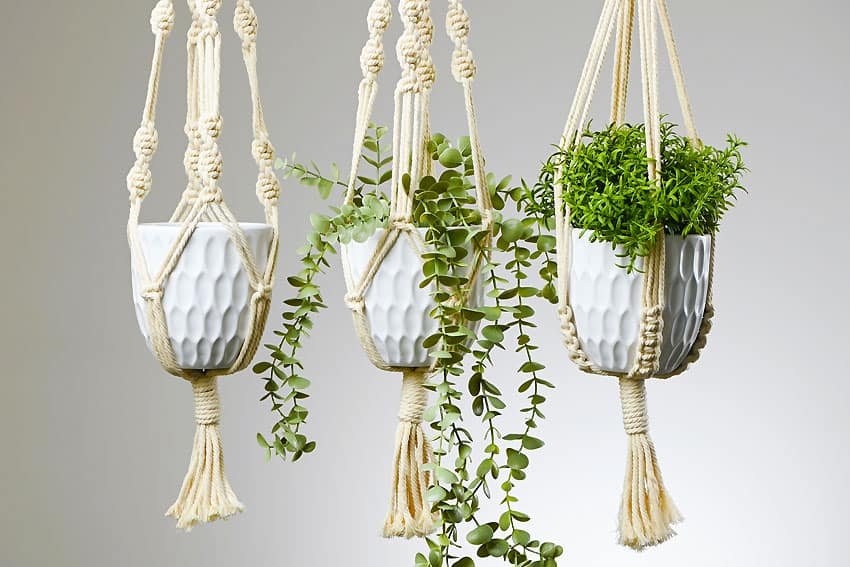

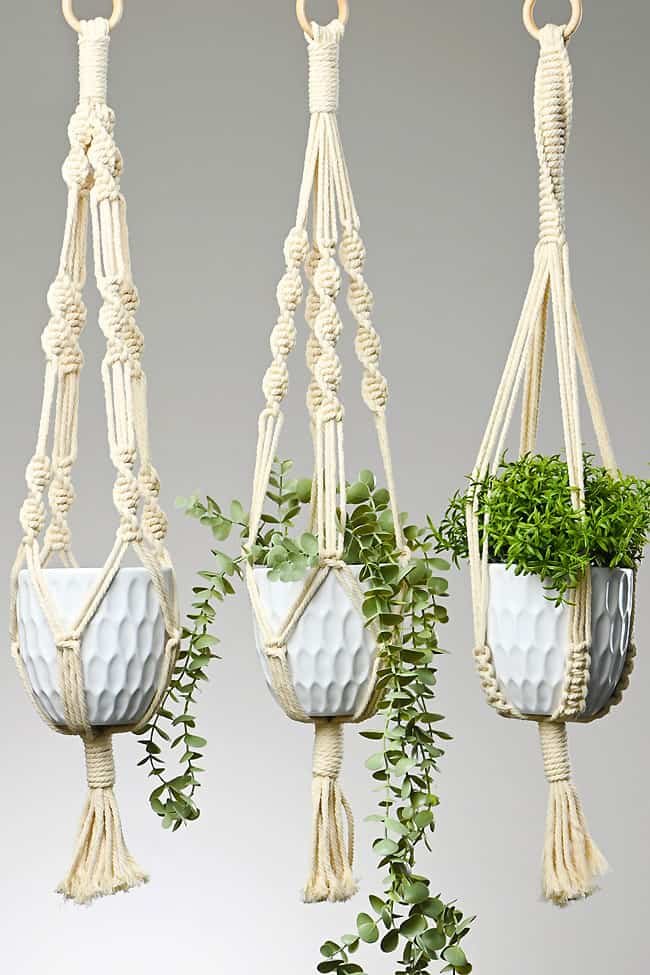
How do I make the other macrame plant hangers shown here?
As mentioned, you can make many different variations of the plant hanger using different combinations of a few simple knots.
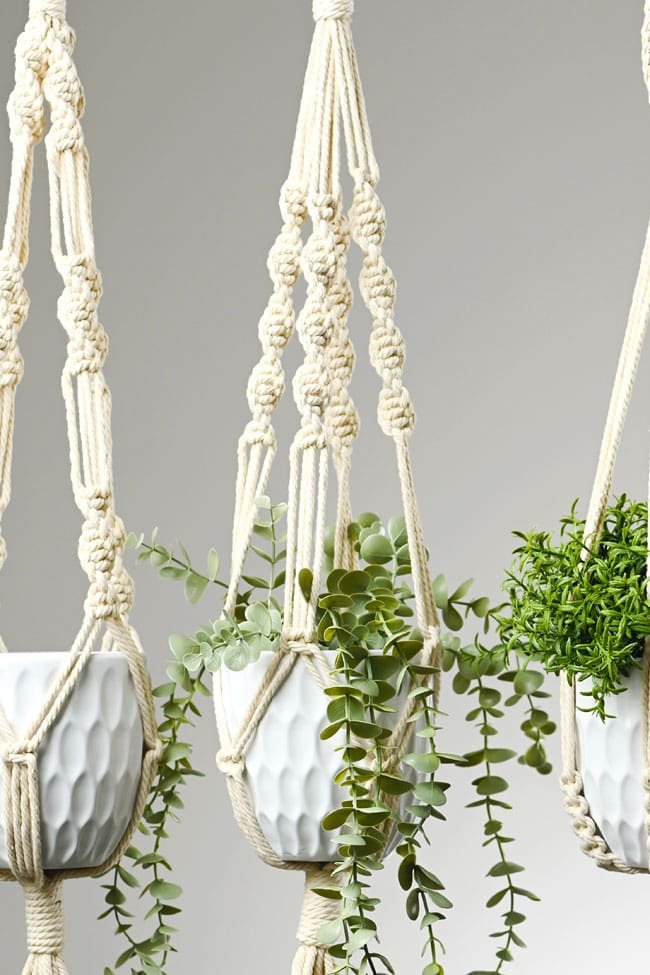
Here are some basic instructions to make the other hanging planters you see in our post.
Macrame Plant Hanger with 3 Spirals:
This is the planter on the left in the picture above. Follow the same instructions in the tutorial above, creating a gathering knot. Then make half square knots with the 4 bundles, creating spirals about 3 inches long.
Skip 3 inches down on the cord and make more spiral knots about 3 inches long. Skip 3 more inches down and knot another 3 inches with the half square knots.
Finally, make alternating square knots about 3 inches below the last spiral. To do this, use 2 cords from one bundle and 2 cords from the other. Then finish up with a 2 inch wrapping knot, about 4 inches below the square knots.
Macrame Hanging Planter with Square Knot Base:
This planter (on the right in the photo above) is made without a gathering knot at the top. Fold the cords over the wooden ring and use 1 cord at the far left and 1 cord at the far right as your working cords, to tie knots around the rest of the cords.
Tie half square knots around all the filler cords, creating a spiral about 7 inches long. Now separate the cords into 4 groups of 4 cords.
Begin making square knots about 13 inches below the last spiral knot. Create lines of square knots about 4 inches long.
Then bring the cords back together by making a 1 inch gathering knot at the base of the square knots.

How much macrame cord is needed for a macrame plant hanger?
We used 87-1/2 feet of macrame cord total to make the plant hanger in our tutorial. As stated above, this makes a hanging planter that’s 30 inches long. The main part of the planter (not including the wrapping knots) requires 80 feet (120 inches) of cord, with each cord being 10 feet long.
These cords are about 4 times longer than the final length of our planter. So, for example, if you want to make a longer planter that’s 50 inches long, start with cords that are each 200 inches long. Also keep in mind that the more knots you add to your hanging planter, the more cord you’ll need.
If you want to try and calculate the exact length needed for yourself, we found that it took about 1 inch of cord to make a half square knot. The 6 inch section of half square knots had 24 knots in it, meaning it took about 24 inches of cord.
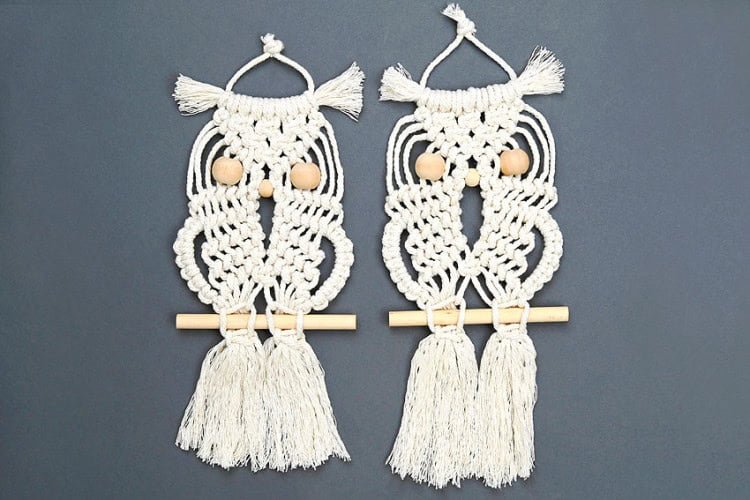
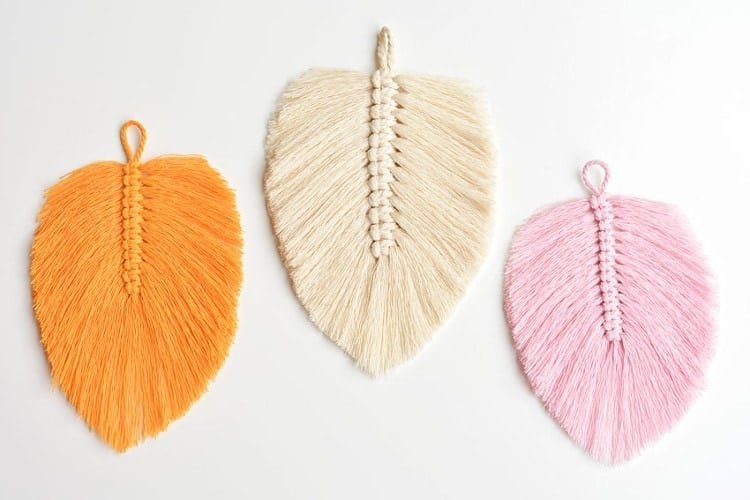
But it’s better to cut your cords longer than you think you need, rather than run out of cord before you’re ready! You can easily use the extra cord you cut off for smaller macrame crafts, like a macrame feather or macrame owl.


Here’s even more macrame craft ideas:
Our book Low-Mess Crafts for Kids is loaded with 72 fun and simple craft ideas for kids! The projects are fun, easy and most importantly low-mess, so the clean up is simple!


