
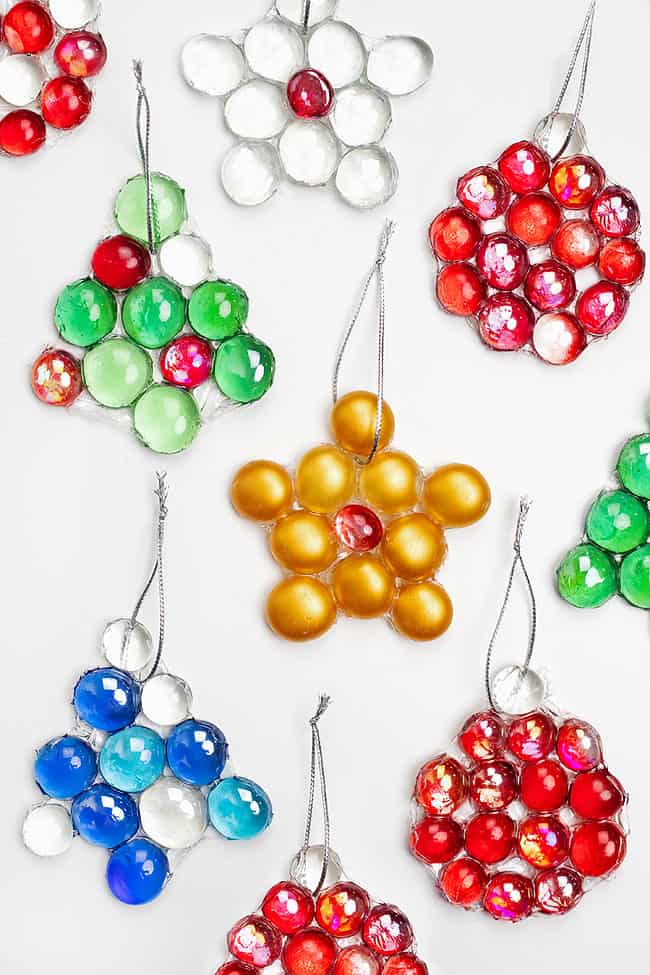
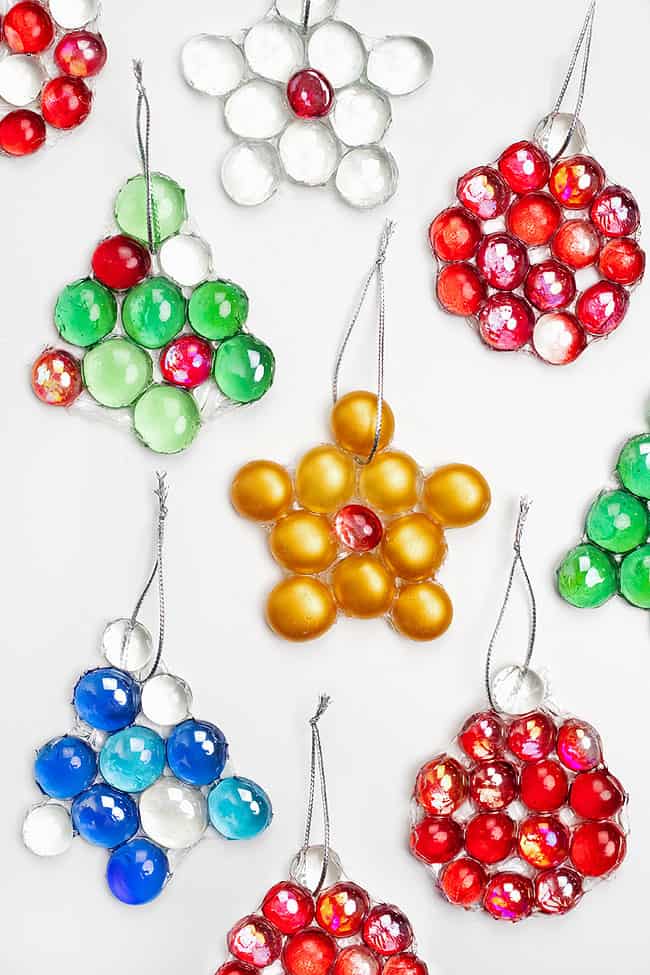
DIY glass bead Christmas ornaments are made by arranging flat glass gems inside a cookie-cutter mold and joining them with a thin layer of clear-drying glue. Once the glue has dried enough to hold the shape, remove the ornament from the mold, let the back finish drying if needed, trim the edges, and add a hanging cord.
This project works best when you plan the bead layout before adding glue, keep the glue layer thin enough to dry through, and use a cookie cutter large enough to fit several flat glass gems without making the finished ornament too heavy.
Glass Bead Christmas Ornaments — Quick Overview
Jump to:
| Project detail | What to know |
|---|---|
| Main material | Flat glass gems, also called flat glass marbles or vase filler |
| Mold | Christmas cookie cutter lined with plastic wrap |
| Binder | Clear-drying craft glue |
| Original project glue depth | About 1/8 inch |
| Initial drying window in the original project | About 2–4 days before demolding, depending on conditions |
| Hanger | Metallic cord threaded through a small hole in the dried glue |
| Best display | Christmas tree, window, gift topper, or another spot where light can pass through the gems |
Supplies You’ll Need
Supply links from the original tutorial:

- Clear-drying craft glue
- Flat glass gems in your chosen colors
- Christmas cookie cutters
- Plastic wrap
- Baking tray or another protected work surface
- Scissors
- Sewing needle or another small pointed tool for making the hanger hole
- Metallic cord or another lightweight ornament hanger
The original project used green, red, and clear glass gems. You can keep the traditional Christmas palette or use a single color, icy blues, jewel tones, or clear gems for a more neutral look.
What Are the Glass Beads Used in These Ornaments?

The “beads” in this project are flat glass gems, not small strung beads with a hole through the center. They are also commonly sold as flat glass marbles or vase filler.
The flat side helps each piece sit securely in the mold, while the rounded top catches and transmits light. Clear and translucent gems show the strongest stained-glass-like effect when the ornament hangs near Christmas lights or a bright window.
This is a different craft from traditional wire-strung or blown-glass bead ornaments. If you want a pipe-cleaner-and-bead project instead, see the DIY Beaded Christmas Ornaments tutorial.
How to Make Glass Bead Christmas Ornaments
Step 1: Gather the Supplies
Set out the flat glass gems, cookie cutters, clear glue, plastic wrap, tray, scissors, needle, and hanging cord.
Before adding glue, place a few gems inside the cookie cutter to confirm the shape is large enough for the bead sizes you have. This quick dry layout can save a lot of rearranging later.
Step 2: Prepare the Cookie-Cutter Mold
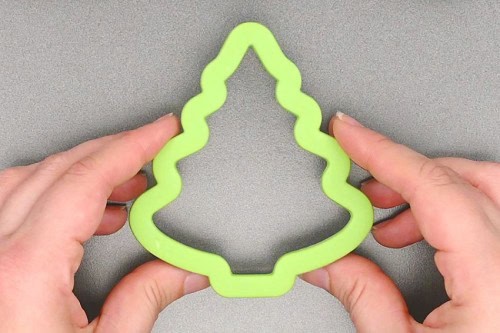
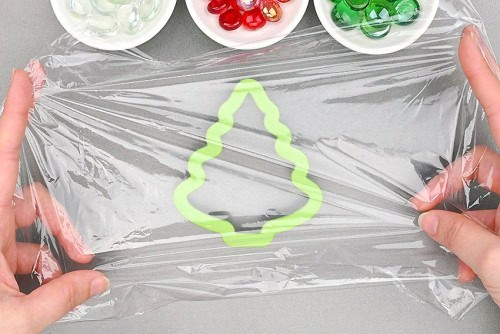
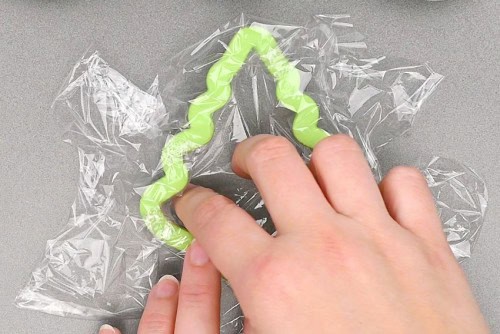
Place the cookie cutter on a tray or another surface that can protect your table from glue.
Cut a piece of plastic wrap larger than the cookie cutter and press it down inside the mold. Smooth the plastic wrap against the bottom, corners, and edges as well as you can.
Wrinkles matter because the dried glue follows the surface underneath it. A smoother lining produces a cleaner back and makes the ornament easier to peel away after drying.
Step 3: Add the Glue and Glass Gems
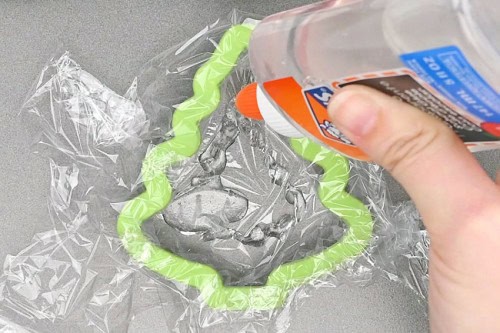
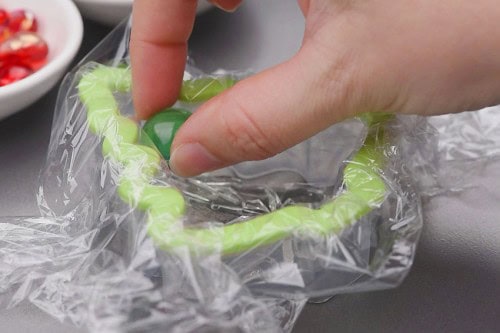
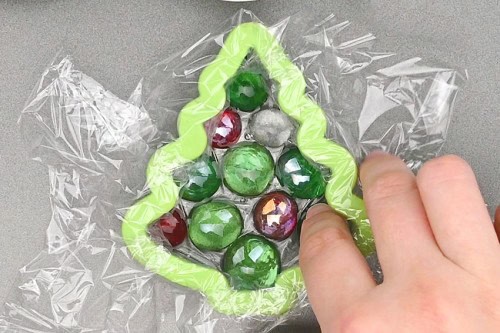
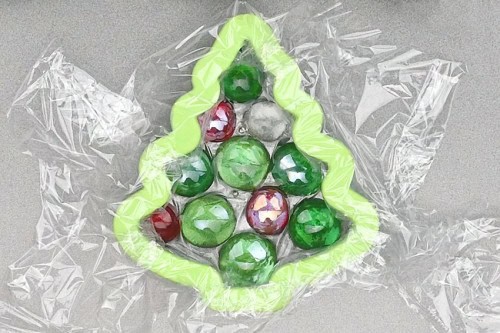
Add a thin layer of clear glue over the plastic wrap. The existing Craft Ideas project used a layer about 1/8 inch deep.
The goal is to use enough glue to connect the glass pieces after drying without creating an unnecessarily thick pool that takes much longer to dry through.
Place the first glass gem near an edge or corner of the cookie cutter. Continue filling the mold, combining different gem sizes when useful so you can reduce large empty spaces.
Move the gems while the glue is still wet until the arrangement looks balanced. Try to keep enough glue between neighboring pieces to create connected bridges after it dries.
Leave the ornament in the mold until the glue has become firm enough to hold the complete shape. In the original project this took about 2–4 days, but glue thickness, room conditions, mold size, and product choice can change the timing.
Step 4: Remove, Finish, and Hang the Ornament
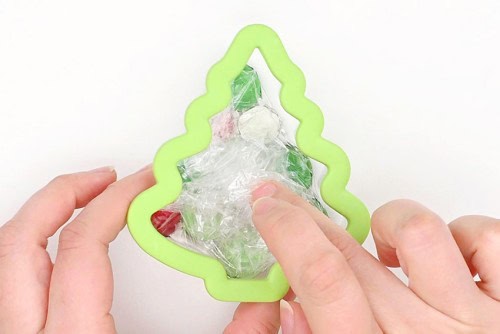
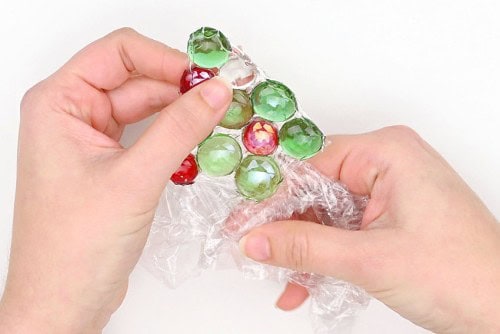
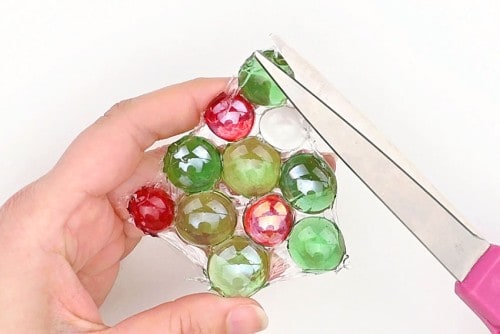
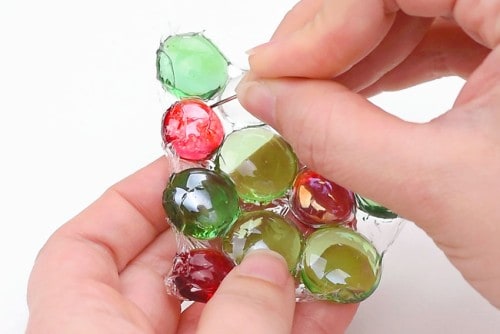
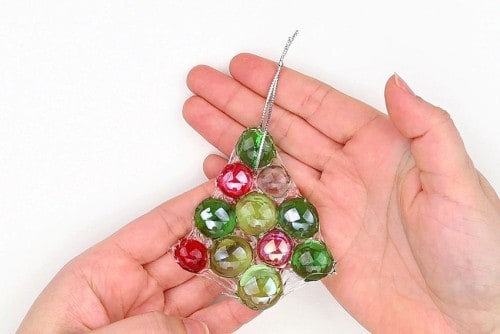
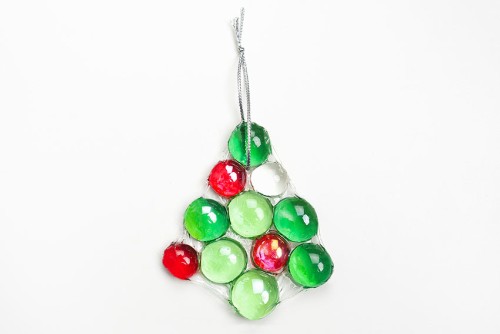
Do not remove the ornament just because the exposed surface looks dry. First check that the glue structure feels firm enough to stay together when the cookie cutter is lifted.
Gather the extra plastic wrap toward the top, then gently lift the cookie cutter away while supporting the ornament.
Peel the plastic wrap from the back. If the underside is still wet or tacky, set the ornament down with that side exposed and allow it to continue drying before trimming or hanging it.
Once the glue is fully firm, trim any thin glue edges that extend beyond the intended shape.
Use a sewing needle to make a small hole through an area of dried glue near the top. Keep the hole in the glue rather than through a glass gem, and leave enough material around the hole so the hanger does not tear through a very thin edge.
Cut a piece of metallic cord, thread it through the hole, and tie the ends together to form a hanging loop. The original tutorial used a 6-inch piece of cord.
What Size Cookie Cutter Works Best?
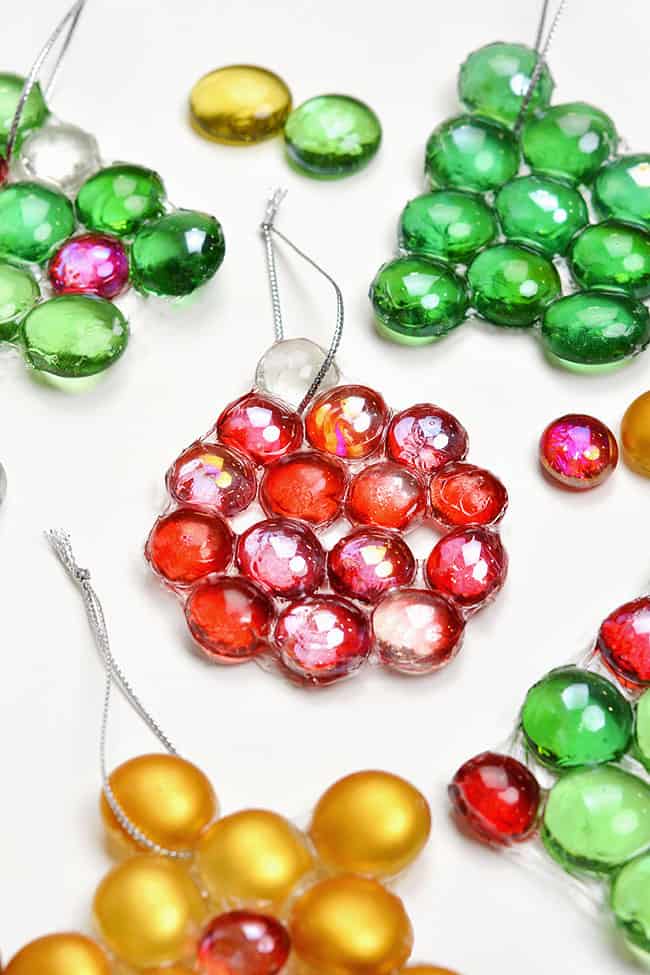
The best cookie-cutter size depends on both the shape and the size of your flat glass gems.
In the existing project, larger cutters in roughly the 3.5- to 5-inch range were easier to fill, while 3-inch star and round ornament cutters still worked but were tighter. The Christmas tree cutter used in the project was about 3.5 inches tall.
A larger mold gives you more freedom to arrange the glass pieces, but it also creates a larger and potentially heavier ornament. Before adding glue, fill the cutter loosely with the gems you plan to use and check both the pattern and overall weight.
How Many Glass Gems Do You Need?
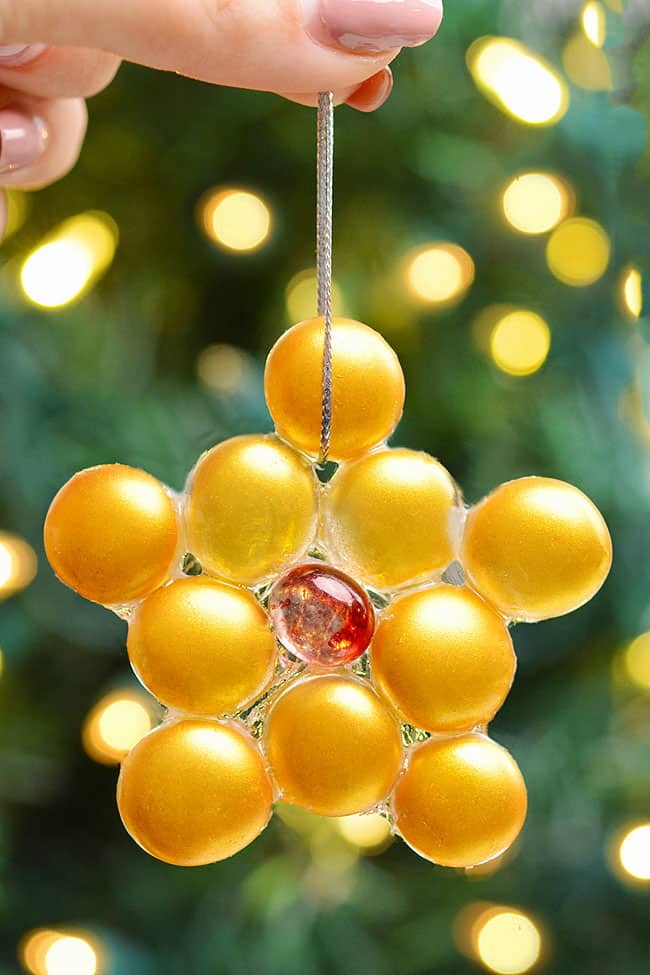
There is no universal bead count because flat glass gems vary in diameter and cookie cutters vary in shape.
The original project used these approximate counts:
- Christmas tree: 11 gems
- Star: 11 gems
- Round ornament shape: 15 gems
Use those numbers only as planning references. A bag with mixed gem sizes may require fewer large pieces or more small pieces to fill the same mold.
Plastic Wrap vs. Foil for the Mold
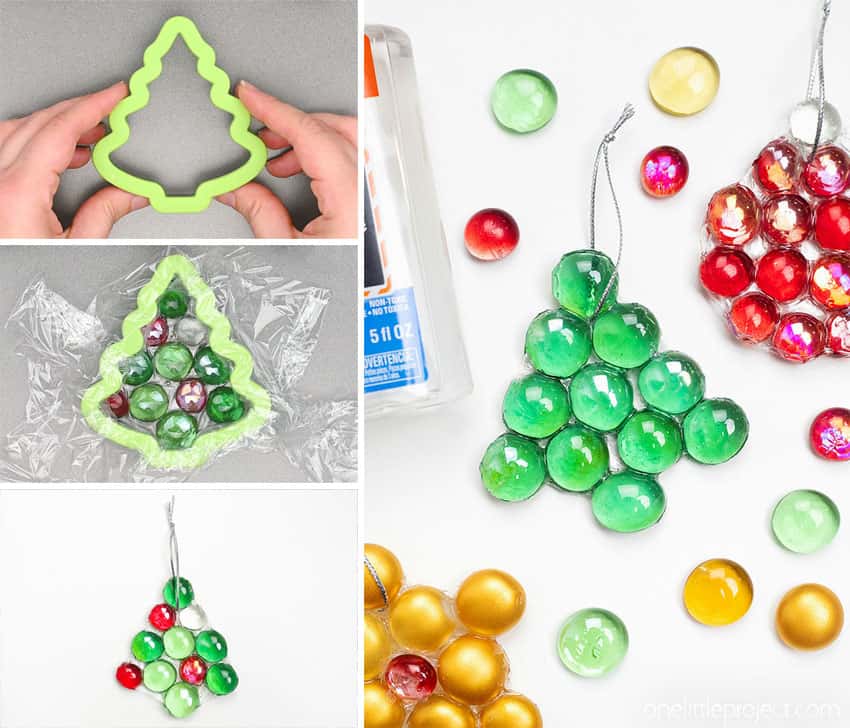
Plastic wrap is the better choice for this specific cookie-cutter method. It can be pressed more smoothly into corners and around detailed shapes, which makes the dried glue easier to release.
The original project reported more problems when foil wrinkled inside the cookie cutter because dried glue caught in the creases. Foil may work for other flat-gem crafts with simpler molds, but there is little advantage to substituting it here when plastic wrap follows the cookie-cutter shape more cleanly.
How to Arrange the Glass Gems Before Gluing
A dry layout is one of the easiest ways to improve the finished ornament.
- Place larger gems first to establish the main pattern.
- Use smaller gems to fill awkward corners and narrow points.
- Keep the heaviest pieces reasonably balanced across the shape.
- Use clear or translucent pieces where you want Christmas lights to shine through.
- Make sure there will be continuous glue paths between the gems instead of isolated pieces.
- Leave a small glue-only area near the top for the hanging hole.
Take a quick photo of the dry arrangement before removing the gems to add glue. It gives you a reference when you rebuild the pattern in the wet mold.
How Long Do Glass Bead Ornaments Take to Dry?
The existing project allowed approximately 2–4 days in the cookie-cutter mold before removing the ornament. If the back was still wet after demolding, it was left exposed for another day or two.
Treat those times as project observations, not a universal glue specification. A thicker glue layer, cooler room, larger mold, less airflow, or a different clear glue can all change drying time.
The safest practical test is structural: do not demold until the glue bridges between the gems are firm enough to hold the complete shape without stretching or separating.
Common Problems and Fixes
The Ornament Bends When I Remove It
The glue has probably not dried enough through the full thickness. Return the ornament to a flat position and give it more time before handling it again.
The Back Is Still Wet
Remove the plastic wrap only if the ornament can hold its shape, then place it with the wet side facing upward so air can reach the back.
The Gems Separate After Drying
The glass pieces may not have had enough glue connecting the spaces between them. On the next ornament, arrange the gems closer together and make sure the glue creates continuous bridges throughout the shape.
The Plastic Wrap Leaves Deep Ridges
Smooth the lining more carefully before adding glue. Detailed cookie cutters need extra attention in corners and narrow points.
The Ornament Is Too Heavy
Use a smaller cutter, fewer large gems, or a lighter mix of materials. Heavy decorations are harder to hang on flexible tree branches.
The Hanger Hole Tears Through
The hole is probably too close to the outer edge or located in a very thin glue bridge. Place the hole through a wider dried-glue area with enough material surrounding it.
Glass Bead Ornament Design Ideas
Classic Christmas
Use red, green, and clear gems in a tree, star, or round ornament mold.
Icy Winter
Combine clear, pale blue, and deeper blue gems for a snow-and-ice palette that can stay on display after Christmas.
Monochrome
Use several shades of the same color and vary the gem sizes instead of the palette.
Suncatcher Style
Prioritize clear and translucent glass, then hang the finished ornament in a bright window where light can pass through the gems.
For another project using the same type of flat glass gems, see the Glass Bead Christmas Candle Holder.
Safety Tips
Flat glass gems, scissors, and a sewing needle all require sensible handling. Inspect the gems before use and set aside any with chips or sharp edges.
- Supervise children according to their age and ability.
- Keep small gems away from children who may put them in their mouths.
- Have an adult handle the needle step when appropriate.
- Use scissors only for trimming dried glue or cutting cord, not for cutting glass.
- Follow the label directions for the exact glue you use.
More DIY Christmas Ornament Ideas
If you want another bead-based project, try DIY Beaded Christmas Ornaments.
For a completely different material, the DIY Clay Ornaments tutorial uses air-dry clay, cookie cutters, and stamps.
If you enjoy handmade geometric ornaments, see the Folded Fabric Star Ornament tutorial.
Frequently Asked Questions
Can You Make Christmas Ornaments With Flat Glass Gems?
Yes. Arrange flat glass gems inside a plastic-wrap-lined cookie cutter and connect them with clear-drying craft glue. After the glue becomes firm enough to hold the shape, remove the ornament from the mold, let the back finish drying if necessary, then add a hanging cord.
Do the Glass Gems Need Holes?
No. This project uses flat glass gems without bead holes. The glue forms the structure around and between the pieces, and the hanger passes through a small hole made in the dried glue near the top of the ornament.
Can I Use Plastic Beads Instead of Glass Gems?
You can adapt the project with other smooth craft pieces, including some plastic beads, as long as the glue you choose bonds appropriately and the pieces create a stable connected shape. The visual effect will differ from flat translucent glass gems, especially when light shines through the ornament.
Can I Use Sea Glass?
Flat, smooth sea-glass pieces can be considered for a variation if they fit the mold and your chosen glue is suitable for the surfaces. Irregular pieces may create larger gaps than manufactured flat gems, so plan the full layout before adding glue.
Can These Ornaments Hang in a Window?
Yes. A window is a good display location for clear and translucent versions because transmitted light highlights the glass colors. Make sure the hanger is secure and place the ornament where it will not strike the glass or another hard surface.
Final Takeaway
The success of DIY glass bead Christmas ornaments comes down to three things: a smooth mold lining, a connected bead layout, and enough drying time.
Plan the glass-gem arrangement first, use a thin but continuous layer of clear glue, wait until the ornament can support its own shape before demolding, and give the underside additional drying time if needed. Once the basic method works, the same cookie-cutter technique makes it easy to experiment with different holiday shapes and color palettes.